Pre-beta features: Difference between revisions
(→Lightmapping: removing example that is not clearly showing lightmapping; making some links pop out more) |
(→Lightmapping: adding another notable lightmapping image) |
||
| Line 18: | Line 18: | ||
[[Image:ManPlant4.JPG|640px]] | [[Image:ManPlant4.JPG|640px]] | ||
It may be hard to believe that this image is in-game, but the jaggies on edges mean that it is unlikely to be a product of the 3D Studio Max renderer (like [[:Image:TCTF0.jpg|this anti-aliased rendering]]), and if one looks closely (click the picture to view it full-size), blockiness is evident in some shadows. Up close, it would be much more noticeable, as in [[:Image:ManPlant2.JPG|this image]], if one looks at the shadow on the metal piece leading down to the tank. Other clear examples of lightmaps can be found in [[:Image:ManPlant14.jpg| | It may be hard to believe that this image is in-game, but the jaggies on edges mean that it is unlikely to be a product of the 3D Studio Max renderer (like [[:Image:TCTF0.jpg|this anti-aliased rendering]]), and if one looks closely (click the picture to view it full-size), blockiness is evident in some shadows. Up close, it would be much more noticeable, as in [[:Image:ManPlant2.JPG|this image]], if one looks at the shadow on the metal piece leading down to the tank. Other clear examples of lightmaps can be found in these pre-beta screenshots of Musashi Manufacturing: [[:Image:ManPlant14.jpg|1]], [[:Image:ManPlant3.JPG|2]], [[:Image:ManPlant11.JPG|3]] ([[:Image:Ch. 2 dynamo room.jpg|3's area now]]). | ||
Perhaps one of the most striking before-after shots illustrating the effect lightmapping had on the game is found in the Man. Plant lobby: | Perhaps one of the most striking before-after shots illustrating the effect lightmapping had on the game is found in the Man. Plant lobby: | ||
Revision as of 00:35, 7 May 2017
- This article is about features of the game engine, not the levels. For screenshots showing old level design vs. new level design, see the Pre-beta content page.
Below, we discuss features that were cut from Oni before release. Features that were mentioned in interviews, but for which there is no evidence that they were actually ever worked on, are not listed here. Only features for which there exist evidence in visual or textual form are documented below.
Multiplayer
- Please see the Multiplayer article for all the gory details on the most infamous missing feature from Oni.
Blood, shadows, and bullet marks

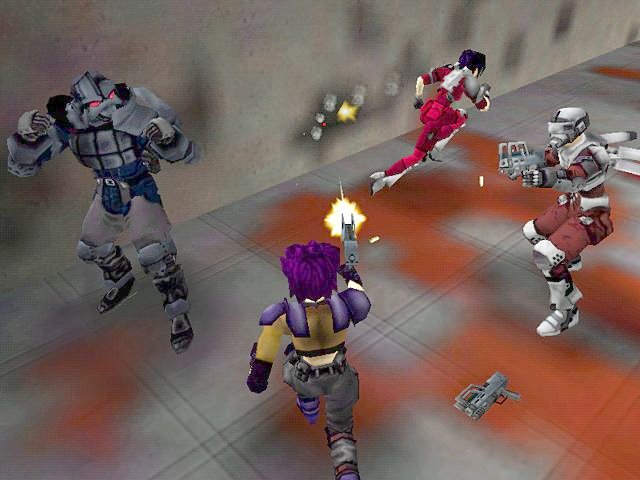
You'll notice that the blood on the floor and the burn effects on the wall are quite blocky in this screenshot, and also could "stack", as seen where the burn effects are darker where Konoko continues to shoot the wall, as well as with the blood seen HERE. This was a real-time system for overlaying effects on the geometry -- basically a stenciling system, but one that filled in spots on a grid rather than using textures.
Since the same system was being used for shadows as for blood, one can see the system in motion, for instance at 0:53 in the 1999 trailer where Konoko's shadow appears as she lands, and morphs along with her movements; as she shoots an enemy, small droplets of blood can be seen exiting his body and hitting the floor, speckling it with red. Another extended shot of real-time shadowing is found starting at 1:14 in the trailer.
All of these dynamic shading effects were quite blocky, so apparently Bungie West couldn't pull it off at a high-enough resolution on computers of the time. The system also seemed to have trouble crossing polygon boundaries, as seen on the floors of these two shots and elsewhere. At some point after the above screenshot was taken, and before the E3 of May 2000, blood was removed from publicly demoed builds. Matt Soell said that this was in order to re-work the effect. "Along with the marks left by bullets, blood will look much better than it used to." Bungie eventually settled for a generic round shadow texture for characters, various textures for the weapons' impact effects, and totally removed blood.
In fact, the explanation for the cutting of blood was not technical limitations, but rather that it interfered with the hit flashes that players needed as cues in a melee fight, and also to avoid a Mature rating from the ESRB (and the equivalents outside of North America). Animated blood would definitely have garnered an "M" rating and limited the number of younger players who were allowed to play the game. This was the first time that Bungie shied away from putting blood in their games, and the Marathon and Myth games had received "M" ratings, so this was a controversial decision among some fans. It's possible that Oni's new owners, Take Two, had a different philosophy on realistic violence vs. marketability.
Lightmapping
It may be hard to believe that this image is in-game, but the jaggies on edges mean that it is unlikely to be a product of the 3D Studio Max renderer (like this anti-aliased rendering), and if one looks closely (click the picture to view it full-size), blockiness is evident in some shadows. Up close, it would be much more noticeable, as in this image, if one looks at the shadow on the metal piece leading down to the tank. Other clear examples of lightmaps can be found in these pre-beta screenshots of Musashi Manufacturing: 1, 2, 3 (3's area now).
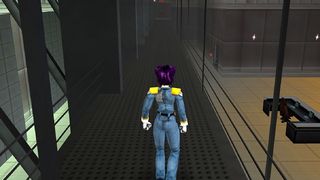
Perhaps one of the most striking before-after shots illustrating the effect lightmapping had on the game is found in the Man. Plant lobby:
The wall in the lobby down to Konoko's right used to have illumination from two point lights on the wall, as well as some sort of dappled light which seems to be coming through the glass windows at the entrance. Now we simply have rectangles for light fixtures, with lens flare sprites slapped on top of them, and no light falling on the wall.
When contemplating why lightmaps were removed, it's important to keep in mind that VRAM on graphics cards often ranged from 8-32MB at the time of Oni's release, and RAM was often 32-64MB during the period of Oni's development. Presumably the feature was cut due to the realization that not all players' computers would have enough memory for lightmaps plus textures throughout the large levels Oni is known for. An anecdotal report here from a forum member indicates that Bungie may have had frame rate troubles as well. Lightmapping was replaced by vertex shading in the final product.
Rigid body physics
Rigid body physics, promised in Oni's positioning statement, more often referred to by fans using plain-English terms like "kickable chairs", were promised for much of Oni's development, but all furniture in the game is now static. Modders have uncovered the fact that there is code present in Oni for movable objects, although the collision is unpolished. Watch Konoko play with spheres and cubes. You'll notice that the cubes (indeed, any movable objects) are treated as spheres by the collision code.
Inverse kinematics
IK, also promised in Oni's positioning statement, was apparently planned in order to make possible certain complex melee, like disarm moves. It was removed when BWest found a simpler solution, as explained by Bungie spokesman Matt Soell here.

