Creating an animation rig in Blender
Introduction
This tutorial shows you how to create the animation rig for Blender (made by geyser), with some improvements.
The purpose of this rig is to give us much better tools to animate, compared to our previous process in Softimage XSI by EdT, which allowed us to animate exclusively with Forward Kinematics. While FK may work for simple, short animations done on characters with a small amount of bones, it does not work well for Oni characters and animations, as it's too labor-intensive and inefficient.
Prerequisite tutorials
I highly recommend watching the tutorials below if you feel you're lacking knowledge in any of these subjects:
General Blender basics:
Blender Character Rigging overview showing that you can create a Rigify rig in less than a minute at 5:43, and also rig a character while at it:
Basics of using Rigify:
Rigify Bone Groups and Layers:
- Rigify Tutorial 7-1: Rigify Bone Groups and Layers (Overview) by CGDive
- Rigify Tutorial 7-2: Rigify Bone Groups and Layers (Practice) by CGDive
- Rigify Tutorial 7-3: Rigify Bone Groups and Layers (Advanced) by CGDive
Changing Rigify Custom Shapes and Widgets:
- Rigify - Custom Shapes/Widgets by CGDive
Blender custom properties and drivers (drivers in the rig described here are used to set the influence of its controllers' bone constraints through the Pose1 and Pose2 bone locations):
- Custom properties and drivers in blender made easy by Pierrick Picaut
Tracking constraint tutorials
These explain constraints like Damped Track which are used by Rigify – you can skip this if you want, but it might give you a better idea of how Rigify's MCH (Mechanical) layers work, or come in handy in the distant future; other than that, you don't need to know them to animate for Oni:
- Tracking Constraints - Blender 2.80 Fundamentals
- Camera Track To vs Damped Track Constraints | Pros & Cons Explained With Examples | Blender by 5 minutes Blender
Things to know before starting
There are several things worth knowing before you start creating the rig.
Tools and relevant tutorials
- Current version of OniSplit. This is the tool needed to import and export assets out of Oni. DO NOT USE OniSplit GUI or Vago for importing Oni assets into Blender - neither of these weren't updated in a long time, and thus they don't support OniSplit's v0.9.99.2 -blender option. You can still use them for other purposes though, such as sounds and converting .oni files to XMLs, etc.
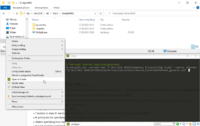
- Cmder (Windows only) - because OniSplit is a command line tool, it is highly recommended to get any upgrade to Windows' Command Prompt. As shown in the screenshot on the right, Cmder allows you to start it from the context menu in any selected folder, and it also remembers your most recently used commands, vastly improving your workflow when you're forced to use any command line tools.
- Oni-Blender tutorial by EdT. Please read this in entirety to know likely-to-happen issues and refer to this as your guide for OniSplit commands relating to Blender.
- Brief overview on creating TRAMs by EdT - while this was written with XSI in mind, this is still relevant as the process for preparing the XML files for Oni is still the same. Also the next post in that thread, called Brief walk through on modifying a TRAM, is an example of that overview put into practice.
Rotation order issue between Oni and Blender
Broken alpha transparency and textures on animated models
Importing animations and preparing the Blender scene
The actual tutorial starts here.
For detailed explanation of the required OniSplit commands, please refer to the Oni-Blender Tutorial by EdT listed in the Tools and relevant tutorials.
- Using OniSplit, export any character you want as a DAE (-extract:dae) using -noanim and -blender arguments.
- As per EdT's Oni-Blender Tutorial, you should get AnimationDaeWriter: custom axis conversion in OniSplit output if you've used the -blender argument. If you didn't get that on the output, it means something most likely went wrong and you won't be able to import the model into Blender (or you will be able to import it but it will be wrong).
- Assuming you wanted a textured model and thus you've exported an ONCC, you should now get a DAE file and an images folder containing the textures for it.
- Using OniSplit, export any two animations as an XML (-extract:xml) using -noanim (T-Pose), -anim-body (lets you specify the character you want) and -blender arguments.
- You should get one DAE and an XML file for each animation, totalling four files.
- Open up Blender and set your scene's frame rate to 60 FPS. If you don't, the keyframes of the imported animations will get tightened up together, because Blender's default scene framerate is 24 FPS.
- Import the -noanim model into Blender first (MAKE SURE YOU CHECK THE Import Unit BOX, otherwise you will import the model with arbitrary units which will break everything and will be basically unadjustable later)
- Import the animations into Blender (ALSO MAKE SURE YOU CHECK THE Import Unit BOX EACH TIME)
- At this point the -noanim/T-posed model in the scene should have no suffix in its body part names, while the animated models should have .001 and .002 suffixes. This is intended; the T-posed model will serve for building the metarig and editing the rig once it's generated, while the animated models are needed for pose matching purposes, where the suffixes are useful for setting up the bone constraints.
- Create three new collections in the Outliner, name them T-pose, Pose 1 and Pose 2. These three collections allow you to quickly hide the respective models from the Viewport using the eye icon in the Outliner.
- Move the T-Posed model to T-pose, and move .001 and .002 animated models to Pose 1 and Pose 2 collections respectively.
- If you've imported the textured model, apply textures to the animated models and fix the alpha transparency issue.
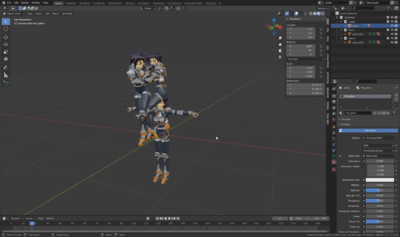
- At this point, your scene should look like in the screenshot on the right.

