Category:Screenshots: Difference between revisions
Paradox-01 (talk | contribs) mNo edit summary |
(added tip on ui_suppress_prompt; clarified camera controls; we can assume that 'x' will work for Dev Mode if the Daodan DLL is installed) |
||
| (8 intermediate revisions by the same user not shown) | |||
| Line 1: | Line 1: | ||
Screenshots from the release version of Oni. Note that: | |||
*Pre-release screenshots go [[:Category:Pre-beta screenshots|HERE]]. | |||
*Modding-related screenshots go in one of the sub-categories [[:Category:Modding images|HERE]]. | |||
: | *Screenshots of the in-game UI go [[:Category:In-game UI screenshots|HERE]]. | ||
: | *Screenshots that aren't from Oni go [[:Category:Images from other media|HERE]]. | ||
---- | |||
Here's how to take screenshots like a pro: | |||
*In your key_config.txt file, add this line: <tt>bind 3 to screenshot</tt> | |||
*Press F1 in-game to bring up the Data Comlink. Type 'x' to activate [[Developer Mode]]. Exit the Comlink screen. | |||
*Bring up the developer console (tilde key in U.S. QWERTY; see [[Developer Mode#Using the console|HERE]] for other keyboards) and enter the commands: | |||
**<tt>gs_show_ui=0</tt> to hide the HUD. | |||
**<tt>ui_suppress_prompt=1</tt> to hide gameplay-related prompts that may pop up at the bottom of the screen. | |||
**<tt>co_display=0</tt> to hide the errors that typically scroll up the screen in Developer Mode. | |||
::(Note that you can write your own BSL function which contains these commands and place it in the [[IGMD/global]] folder. Then all you have to do is run your function from the dev console.) | |||
*Close the console and press Enter in-game to get the free-flying camera. Turn it and move it around by using the numpad keys, or press Enter a second time to turn the camera with your mouse. See {{SectionLink|Developer Mode|Camera controls}} for the controls. | |||
*Press '3' whenever you have a good shot! The screenshots will be saved next to the Oni application. They are saved in BMP format, so make sure to find a program that can batch-convert files to JPEG or PNG. | |||
[[Category:Oni game images]] | [[Category:Oni game images]] | ||
Latest revision as of 16:15, 5 April 2026
Screenshots from the release version of Oni. Note that:
- Pre-release screenshots go HERE.
- Modding-related screenshots go in one of the sub-categories HERE.
- Screenshots of the in-game UI go HERE.
- Screenshots that aren't from Oni go HERE.
Here's how to take screenshots like a pro:
- In your key_config.txt file, add this line: bind 3 to screenshot
- Press F1 in-game to bring up the Data Comlink. Type 'x' to activate Developer Mode. Exit the Comlink screen.
- Bring up the developer console (tilde key in U.S. QWERTY; see HERE for other keyboards) and enter the commands:
- gs_show_ui=0 to hide the HUD.
- ui_suppress_prompt=1 to hide gameplay-related prompts that may pop up at the bottom of the screen.
- co_display=0 to hide the errors that typically scroll up the screen in Developer Mode.
- (Note that you can write your own BSL function which contains these commands and place it in the IGMD/global folder. Then all you have to do is run your function from the dev console.)
- Close the console and press Enter in-game to get the free-flying camera. Turn it and move it around by using the numpad keys, or press Enter a second time to turn the camera with your mouse. See Developer Mode § Camera controls for the controls.
- Press '3' whenever you have a good shot! The screenshots will be saved next to the Oni application. They are saved in BMP format, so make sure to find a program that can batch-convert files to JPEG or PNG.
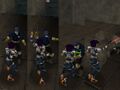
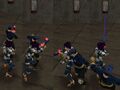
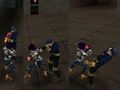
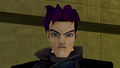
Media in category "Screenshots"
The following 57 files are in this category, out of 57 total.
 ALARM CONSOLE.png 96 × 264; 24 KB
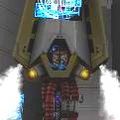
 Barabas kidnaps Shinatama.jpg 2,560 × 1,440; 301 KB
 Bipolar Bomber.jpg 520 × 665; 58 KB
 Campbell Equalizer.jpg 570 × 540; 27 KB
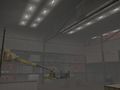
 Ch. 2 dynamo room.jpg 1,680 × 1,050; 301 KB
 Ch. 2 lobby after.jpg 1,449 × 814; 201 KB
 Combat Training firing range.jpg 640 × 480; 37 KB
 Compound 1.jpg 640 × 480; 41 KB
 Compound 2.jpg 640 × 480; 48 KB
 Compound 3.jpg 640 × 480; 23 KB
 Compound 4.jpg 640 × 480; 40 KB
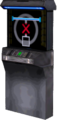 CONTROL CONSOLE.png 116 × 244; 30 KB
 Crescent Kick.gif 150 × 150; 230 KB
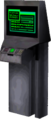 DATA CONSOLE.png 100 × 234; 20 KB
 Deadly Brain small.jpg 121 × 121; 5 KB
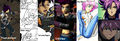 Different Konokos.jpg 800 × 276; 77 KB
 Dream obj images spawned.jpg 1,024 × 576; 62 KB
 Gliding Konoko (no background).png 164 × 181; 23 KB
 Jellocam 1.jpg 640 × 480; 70 KB
 JelloFix-distant cam.jpg 1,024 × 768; 91 KB
 JelloFix-normal cam.jpg 1,024 × 768; 112 KB
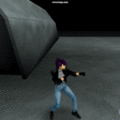
 KONCOMrun throw fw.jpg 640 × 480; 77 KB
 KONCOMrun thw fw k.jpg 640 × 480; 76 KB
 KONCOMrun tkl bk p.jpg 640 × 480; 67 KB
 KONCOMthrow bk k.jpg 640 × 480; 63 KB
 KONCOMthrow bk.jpg 640 × 480; 67 KB
 KONCOMthrow fw k.jpg 640 × 480; 69 KB
 KONCOMthrow fw p.jpg 640 × 480; 68 KB
 KONPISthrow bk.jpg 640 × 480; 74 KB
 KONPISthrow fw k.jpg 640 × 480; 74 KB
 KONPISthrow fw p.jpg 640 × 480; 73 KB
 KONRIFthrow bk p.jpg 640 × 480; 75 KB
 KONRIFthrow fw p.jpg 640 × 480; 68 KB
 Muro 2001.png 320 × 180; 80 KB
 Muro blanka attack.jpg 900 × 720; 176 KB
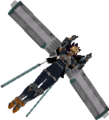
 Mutant Muro with supershield.jpg 1,280 × 720; 180 KB
 No 1 Chris Hughes in situ.jpg 640 × 480; 25 KB
 Off-center render.png 3,439 × 1,440; 2.72 MB
 ONCC body size factor-original.jpg 840 × 525; 40 KB
 ONCC body size factor-sleep insertion.jpg 840 × 525; 41 KB
 ONCC body size factor-spawn order change.jpg 840 × 525; 41 KB
 Ray-casting failure.jpg 1,024 × 768; 107 KB
 Rear TCTF pistol disarm.gif 200 × 200; 522 KB
 REDCOMrun thw bk k.jpg 640 × 480; 76 KB
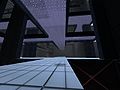
 Rooftops towers.jpg 640 × 480; 46 KB
 Shinatama tortured by Muro.jpg 800 × 600; 38 KB
 Showcase screenshot 1.png 640 × 480; 306 KB
 Showcase screenshot 2.png 640 × 480; 339 KB
 SMALL CONSOLE.png 86 × 168; 17 KB
 Spanish Mac - mystery question mark in SUBT.png 1,024 × 768; 411 KB
 Tanker rifle lunge.gif 220 × 129; 341 KB
 TCTF parking lot external.jpg 1,680 × 1,050; 247 KB
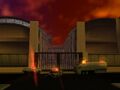 Vago Biotech front gate.jpg 640 × 480; 40 KB
 Vago Lab acid machine.jpg 320 × 240; 11 KB
 Warehouse from splashscreen angle.jpg 640 × 480; 25 KB
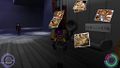
 Warehouse not lightmapped.jpg 1,024 × 768; 123 KB
 Zombie Shinatama.png 376 × 356; 132 KB


.png)


