Pre-beta content: Difference between revisions
(added a bunch more RSB images from our storehouse) |
(added other piece of supporting evidence for BGI HQ being Syndicate HQ) |
||
| (9 intermediate revisions by the same user not shown) | |||
| Line 60: | Line 60: | ||
|align="center" | [[Image:Genesis Level2 10.jpg|320px]] | |align="center" | [[Image:Genesis Level2 10.jpg|320px]] | ||
|align="center" | [[Image:Genesis Level2 1.jpg|320px]] | |align="center" | [[Image:Genesis Level2 1.jpg|320px]] | ||
|[[Image:Genesis Level2 2.jpg|320px]] | |[[Image:Genesis Level2 2.jpg|320px]] | ||
|- | |- | ||
|[[Image:Genesis Level2 3.jpg|320px]] | |[[Image:Genesis Level2 3.jpg|320px]] | ||
|[[Image:Genesis Level2 4.jpg|320px]] | |[[Image:Genesis Level2 4.jpg|320px]] | ||
|[[Image:Genesis Level2 5.jpg|320px]] | |||
|- | |- | ||
|[[Image:Genesis Level2 6.jpg|320px]] | |[[Image:Genesis Level2 6.jpg|320px]] | ||
| align="center" | [[Image:Pre-beta ManPlant 1.jpg]]<br>[[Image:Pre-beta ManPlant 2.jpg]] | |||
| | |||
|- | |- | ||
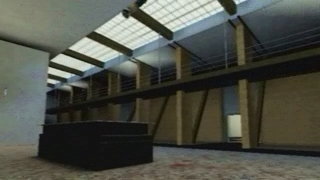
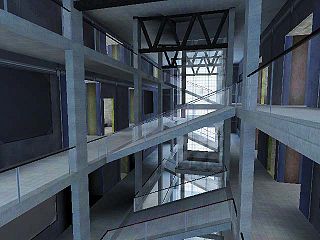
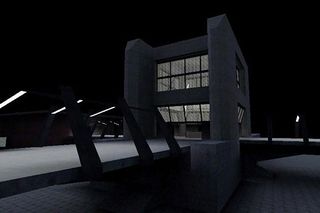
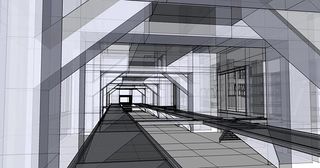
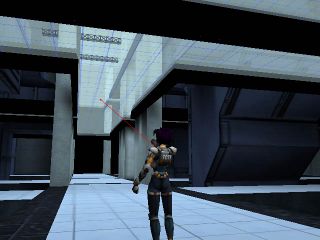
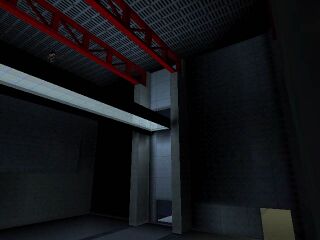
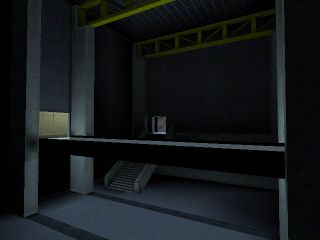
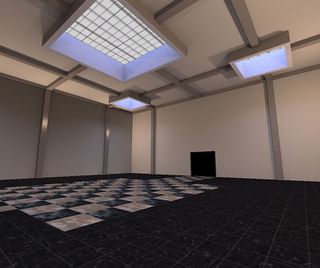
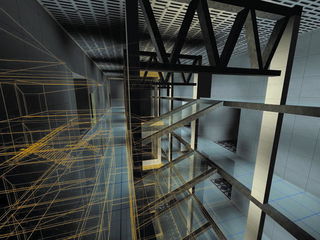
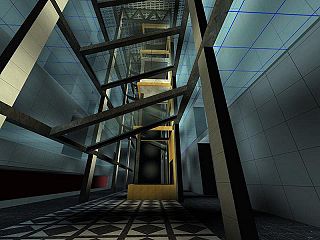
| colspan=" | | colspan="3" | Note the door leading off the center of the foyer: there was a corridor running through the middle of the building. The catwalk in the foyer has an interesting texture to the sides of its railings that isn't seen in other pre-beta shots of the level. | ||
|} | |} | ||
| Line 89: | Line 89: | ||
|+'''Inner flyway and back of the building''' | |+'''Inner flyway and back of the building''' | ||
|- | |- | ||
| align="center" |[[Image:Pre-beta ManPlant 3.jpg]] | | align="center" | [[Image:Pre-beta ManPlant 3.jpg]] | ||
|[[Image:ManPlant4.jpg|320px]] | |[[Image:ManPlant4.jpg|320px]] | ||
| align="center" | [[Image:Genesis Level2 11.jpg|320px]] | |||
|- | |- | ||
|[[Image:ManPlant15.jpg|320px]] | |[[Image:ManPlant15.jpg|320px]] | ||
|[[Image:Genesis Level2 12.jpg|320px]] | |[[Image:Genesis Level2 12.jpg|320px]] | ||
|[[Image:ManPlant5.jpg|320px]] | |[[Image:ManPlant5.jpg|320px]] | ||
| Line 100: | Line 99: | ||
|[[Image:ManPlant6.jpg|320px]] | |[[Image:ManPlant6.jpg|320px]] | ||
|[[Image:ManPlant7.jpg|320px]] | |[[Image:ManPlant7.jpg|320px]] | ||
|[[Image:ManPlant8.jpg|320px]] | |||
|- | |- | ||
| | | colspan="3" | [[Image:ManPlant9.jpg|320px]] | ||
|[[Image:ManPlant9.jpg|320px]] | |||
|- | |- | ||
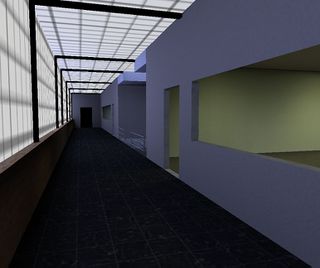
| colspan=" | | colspan="3" | The stairs lead up to the offices. More lightmapping here, adding volume to the barely-textured level. | ||
|} | |} | ||
| Line 112: | Line 111: | ||
|[[Image:Genesis Level2 13.jpg|320px]] | |[[Image:Genesis Level2 13.jpg|320px]] | ||
|[[Image:Pre-beta Office 3.jpg]] | |[[Image:Pre-beta Office 3.jpg]] | ||
| align="center" | [[Image:Pre-beta Office 4.jpg]] | |||
|- | |- | ||
|[[Image:Pre-beta Office 5.jpg]] | |[[Image:Pre-beta Office 5.jpg]] | ||
| align="center" | [[Image:Pre-beta Office 1.jpg]] | | align="center" | [[Image:Pre-beta Office 1.jpg]] | ||
|[[Image:Pre-beta Office 2.jpg]] | |[[Image:Pre-beta Office 2.jpg]] | ||
|- | |- | ||
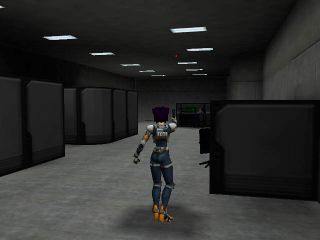
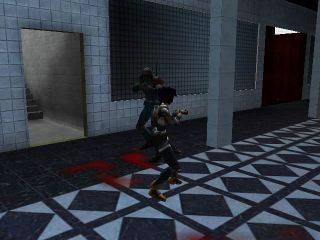
| colspan=" | | colspan="3" | The offices seem to be in the back of the building, on both floors, with doors and "windows" onto the "alarm console gallery". First 4 pics: lower floor, the empty dark wall on the first is where the stairs are. Last 2 pics: upper floor. | ||
|} | |} | ||
| Line 140: | Line 138: | ||
|[[Image:Genesis Level3 6.jpg|320px]] | |[[Image:Genesis Level3 6.jpg|320px]] | ||
|[[Image:Genesis Level3 7.jpg|320px]] | |[[Image:Genesis Level3 7.jpg|320px]] | ||
|[[Image:Vago18.jpg|320px]] | |||
|- | |- | ||
|[[Image:Vago17.jpg|320px]] | |[[Image:Vago17.jpg|320px]] | ||
|[[Image:Vago3.jpg|320px]] | |[[Image:Vago3.jpg|320px]] | ||
|[[Image:Genesis Level3 11.jpg|320px]] | |[[Image:Genesis Level3 11.jpg|320px]] | ||
| Line 149: | Line 146: | ||
|[[Image:Pre-beta Vago Lab.png|320px]] | |[[Image:Pre-beta Vago Lab.png|320px]] | ||
|[[Image:Vago11.jpg|320px]] | |[[Image:Vago11.jpg|320px]] | ||
| | |||
|- | |- | ||
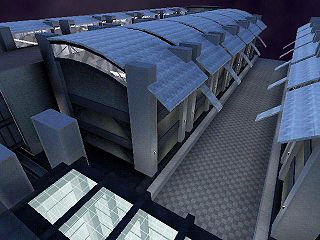
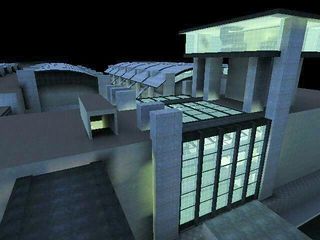
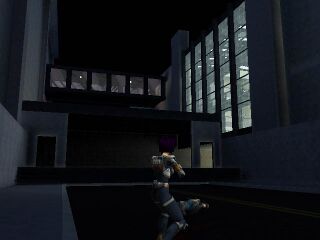
| colspan=" | | colspan="3" | The interior is only done in one half of the lab. There are also pillars and foyer doors missing, and extra ledges along the sides of the area where you fight Barabas. | ||
|} | |} | ||
| Line 158: | Line 156: | ||
|[[Image:Genesis Level3 8.jpg|320px]] | |[[Image:Genesis Level3 8.jpg|320px]] | ||
|[[Image:Genesis Level3 1.jpg|320px]] | |[[Image:Genesis Level3 1.jpg|320px]] | ||
|[[Image:Genesis Level3 2.jpg|320px]] | |||
|- | |- | ||
|[[Image:Genesis Level3 3.jpg|320px]] | |[[Image:Genesis Level3 3.jpg|320px]] | ||
|[[Image:Genesis Level3 4.jpg|320px]] | |||
|[[Image:Genesis Level3 5.jpg|320px]] | |||
|- | |- | ||
|[[Image:Genesis Level3 12.jpg|320px]] | |[[Image:Genesis Level3 12.jpg|320px]] | ||
|[[Image:Genesis Level3 9.jpg|320px]] | |[[Image:Genesis Level3 9.jpg|320px]] | ||
|[[Image:Genesis Level3 10.jpg|320px]] | |[[Image:Genesis Level3 10.jpg|320px]] | ||
|- | |- | ||
| colspan=" | | colspan="3" | There were stools for the scientists... apart from that, this wing is pretty much final. | ||
|} | |} | ||
| Line 238: | Line 235: | ||
|[[Image:Genesis Level8 9.jpg|320px]] | |[[Image:Genesis Level8 9.jpg|320px]] | ||
|[[Image:Genesis Level8 3.jpg|320px]] | |[[Image:Genesis Level8 3.jpg|320px]] | ||
|[[Image:TCTF13.jpg|320px]] | |||
|- | |- | ||
|[[Image:TCTF14.jpg|320px]] | |[[Image:TCTF14.jpg|320px]] | ||
|[[Image:TCTF15.jpg|320px]] | |[[Image:TCTF15.jpg|320px]] | ||
|[[Image:TCTF17.jpg|320px]] | |[[Image:TCTF17.jpg|320px]] | ||
|- | |- | ||
| colspan="2" | The ramps had really nice railings | | colspan="2" | The ramps had really nice railings. Overall the room was much lighter (there's a light wall on the far side). Same "V" structures at the ceiling as above; they're gone now. The layout of the rooms on either side is different, too. | ||
|} | |} | ||
| Line 254: | Line 250: | ||
|[[Image:TCTF11.jpg|320px]] | |[[Image:TCTF11.jpg|320px]] | ||
|- | |- | ||
| colspan="2" | The model didn't change at all, but now it's placed at the center (floor 2/3) of a really tall, open room. As for the terminals, there are primitive ones with similar looks around Damocles and elsewhere. | |||
| colspan="2" | The model didn't change at all, but now it's placed at the center (floor 2/3) of a really tall, open room. As for the terminals, there are primitive ones with similar looks around Damocles and elsewhere | |||
|} | |} | ||
| Line 278: | Line 272: | ||
|[[Image:TCTF5.jpg|320px]] | |[[Image:TCTF5.jpg|320px]] | ||
|[[Image:TCTF19.jpg|320px]] | |[[Image:TCTF19.jpg|320px]] | ||
|[[Image:TCTF20.jpg|320px]] | |||
|} | |} | ||
| Line 288: | Line 281: | ||
|[[Image:Turbitt - ACC 1.jpg|320px]] | |[[Image:Turbitt - ACC 1.jpg|320px]] | ||
|[[Image:Turbitt - ACC 2.jpg|320px]] | |[[Image:Turbitt - ACC 2.jpg|320px]] | ||
|[[Image:Turbitt - ACC 3.jpg|320px]] | |||
|- | |- | ||
|[[Image:Turbitt - ACC 4.jpg|320px]] | |[[Image:Turbitt - ACC 4.jpg|320px]] | ||
|[[Image:Turbitt - ACC 5.jpg|320px]] | |[[Image:Turbitt - ACC 5.jpg|320px]] | ||
|[[Image:Turbitt - ACC 6.jpg|320px]] | |[[Image:Turbitt - ACC 6.jpg|320px]] | ||
|- | |- | ||
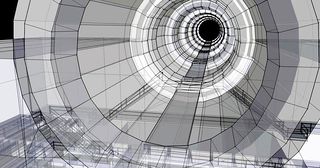
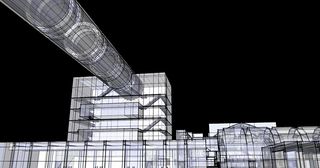
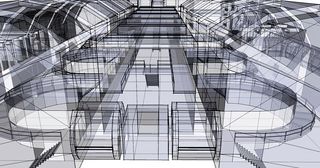
| colspan=" | | colspan="3" | These shots are probably from the time when [[Oni/Early Story|this was an electric plant]]. Note that the giant tube that serves as the end of the level (seen in the first pic) has a floor to walk on, in place of the electrified beam suspended in the middle, which Konoko runs down while being pursued by the TCTF. The pipe is also connected directly to the building, rather than being at the top of an elevator shaft. In the current version of the level, the mid-air beam is also the shaft for the giant fan; adding the fan was probably a hasty improvisation to make the level seem more like an ACC and less like an electric plant... but the fan shaft is still electrified! | ||
|} | |} | ||
| Line 305: | Line 297: | ||
{| style="width:650px;" | {| style="width:650px;" | ||
|+'''The foyer and lobby''' | |+'''The foyer and lobby''' | ||
|[[Image: | |[[Image:RegionalState5.jpg|320px]] | ||
| | |[[Image:RegionalState26.jpg|320px]] | ||
|[[Image:RegionalState25.jpg|320px]] | |||
|- | |- | ||
|[[Image:RegionalState4.jpg|320px]] | |||
|[[Image:RegionalState1.jpg|320px]] | |||
|[[Image:RegionalState23.jpg|320px]] | |[[Image:RegionalState23.jpg|320px]] | ||
|- | |- | ||
| | | align="center" | [[Image:1999 Trailer ID fight.jpg]] | ||
|[[Image:Pre-beta RSB 1.jpg|320px]] | |||
| | | | ||
|} | |} | ||
| Line 347: | Line 336: | ||
|[[Image:RegionalState12.jpg|320px]] | |[[Image:RegionalState12.jpg|320px]] | ||
|[[Image:RegionalState13.jpg|320px]] | |[[Image:RegionalState13.jpg|320px]] | ||
|[[Image:RegionalState14.jpg|320px]] | |||
|} | |} | ||
| Line 356: | Line 344: | ||
|[[Image:RegionalState20.jpg|320px]] | |[[Image:RegionalState20.jpg|320px]] | ||
|[[Image:RegionalState21.jpg|320px]] | |[[Image:RegionalState21.jpg|320px]] | ||
|[[Image:RegionalState22.jpg|320px]] | |||
|} | |} | ||
| Line 363: | Line 350: | ||
{| style="width:650px;" | {| style="width:650px;" | ||
|+'''Outside''' | |+'''Outside''' | ||
| align="center" | [[Image:Konoko runs from Iron Demon.jpg]] | | align="center" | [[Image:Konoko runs from Iron Demon.jpg|320px]] | ||
|[[Image:RegionalState10.jpg|320px]] | |[[Image:RegionalState10.jpg|320px]] | ||
|[[Image:RegionalState9.jpg|320px]] | |[[Image:RegionalState9.jpg|320px]] | ||
| Line 379: | Line 366: | ||
|[[Image:RegionalState17.jpg|320px]] | |[[Image:RegionalState17.jpg|320px]] | ||
|- | |- | ||
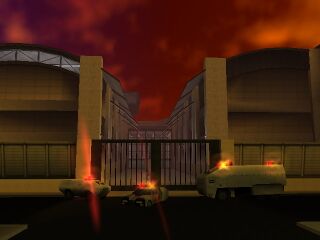
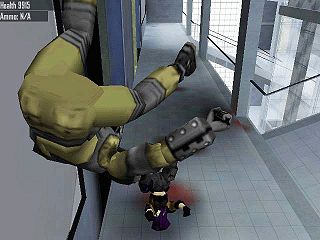
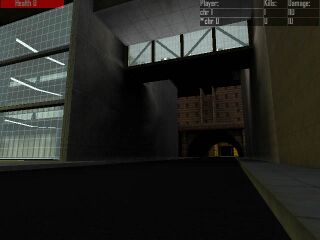
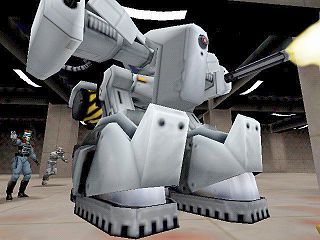
| colspan="3" | By the time Bungie took the outside shot with the Iron Demon, they'd barred in the foyer. Also, notice the missing wall of glass in the last set of pics. This section is now occupied by a wall with a normal-sized door set in the middle of it. The original wide-open entrance is an odd design choice. Could it have been a pet door for the Iron Demon? Most likely the | | colspan="3" | By the time Bungie took the outside shot with the Iron Demon, they'd barred in the foyer. Also, notice the missing wall of glass in the last set of pics. This section is now occupied by a wall with a normal-sized door set in the middle of it. The original wide-open entrance is an odd design choice. Could it have been a pet door for the Iron Demon? Most likely the giant robot was only shown in this level because [https://carnage.bungie.org/oniforum/oni.forum.pl?read=19078 it was their "testbed" level], since the mech was really meant for BGI HQ, but perhaps an initial skirmish was once planned here. Finally, note the multiplayer HUD in the top-right of many of these pictures; the screenshot taker was in MP mode at the time. | ||
|} | |} | ||
| Line 416: | Line 403: | ||
|[[Image:Turbitt - Science Prison 1.jpg|320px]] | |[[Image:Turbitt - Science Prison 1.jpg|320px]] | ||
|[[Image:Turbitt - Science Prison 2.jpg|320px]] | |[[Image:Turbitt - Science Prison 2.jpg|320px]] | ||
|[[Image:Turbitt - Science Prison 3.jpg|320px]] | |||
|- | |- | ||
|[[Image:Turbitt - Science Prison 4.jpg|320px]] | |[[Image:Turbitt - Science Prison 4.jpg|320px]] | ||
|[[Image:Turbitt - Science Prison 5.jpg|320px]] | |||
| | |||
|- | |- | ||
| colspan=" | | colspan="3" | There used to be some very interesting lit walkways leading in and out of the security tower. They were replaced on all three sides by corridors with laser obstacles. The last picture shows an interesting area that was apparently removed, which is roughly in the same position as the acid vat complex in the final model. | ||
|} | |} | ||
| Line 452: | Line 439: | ||
|[[Image:Compound3.jpg|320px]] | |[[Image:Compound3.jpg|320px]] | ||
|[[Image:Compound4.jpg|320px]] | |[[Image:Compound4.jpg|320px]] | ||
| | |[[Image:Compound8.jpg|320px]] | ||
|- | |- | ||
|[[Image:Compound9.jpg|320px]] | |[[Image:Compound9.jpg|320px]] | ||
|[[Image:Compound10.jpg|320px]] | |[[Image:Compound10.jpg|320px]] | ||
|[[Image:Compound11.jpg|320px]] | |[[Image:Compound11.jpg|320px]] | ||
|- | |||
|[[Image:Compound12.jpg|320px]] | |[[Image:Compound12.jpg|320px]] | ||
|[[Image:Compound15.jpg|320px]] | |||
| | |||
|- | |- | ||
| colspan="3" | The basic layout of the room is the same, but it was much more crowded with "computers" and the existing catwalks were aligned differently. | | colspan="3" | The basic layout of the room is the same, but it was much more crowded with "computers" and the existing catwalks were aligned differently. In the last picture (early development?) there are no computers at all, the bottom floor is missing, and the set of catwalks/stairs is minimal. | ||
|} | |} | ||
| Line 494: | Line 477: | ||
{{Quotebox|align=none|width=850px|source=--[http://carnage.bungie.org/oniforum/oni.forum.pl?read=14227 Chris Butcher]|quote=the term "removed" is a little misleading... it's not as if oni had 19 complete levels, and we just decided to leave five of them off the CD. levels 7, 15 and 16 were never more than a name and number. the other two (5: airport underground, and 17: bgi hq) were only partly modelled before being discarded in favor of reworking the existing environments to include those elements. with few exceptions, all of the cool stuff that we created made it into the game.}} | {{Quotebox|align=none|width=850px|source=--[http://carnage.bungie.org/oniforum/oni.forum.pl?read=14227 Chris Butcher]|quote=the term "removed" is a little misleading... it's not as if oni had 19 complete levels, and we just decided to leave five of them off the CD. levels 7, 15 and 16 were never more than a name and number. the other two (5: airport underground, and 17: bgi hq) were only partly modelled before being discarded in favor of reworking the existing environments to include those elements. with few exceptions, all of the cool stuff that we created made it into the game.}} | ||
Butcher's recollection is slightly off, as we'll see below; the levels which never existed in any substantial way were 15 and 17, and BGI HQ was 16. The results of our investigation below are that the missing level5 was indeed another airport level, level7 was relocated to another slot (see {{SectionLink||Obsolete}}), 15 and 17 were the levels that never really existed, and 16 was very incomplete (see {{SectionLink||BGI HQ}}). | |||
===Names of these levels=== | ===Names of these levels=== | ||
Speaking of names and numbers, this information for a level is stored in a resource called [[ONLD]] in the global level file level0_Final so that the Load Game screen can display all the levels. | Speaking of names and numbers, this information for a level is stored in a resource called [[ONLD]] in the global level file level0_Final so that the Load Game screen can display all the levels. Surprisingly, the ONLDs for some missing levels are still present in retail versions of Oni. These levels do not show in the Load Game list because the actual level data is absent, but the extracted names and numbers from their ONLDs are found below. | ||
It appears that levels below 20 were intended as single-player levels, 30-35 were multiplayer maps, and the rest were test levels. For some of those levels there are fragmentary scripts which can be found in the [[European Mac releases]] of Oni, though we have to infer which script folders were connected with which levels based on the folders' abbreviated names. If there is any info to be gleaned from those scripts, it is described in that level's section. Here are the missing levels alongside their presumed script folder names. Click the name to jump to that section below: | It appears that levels below 20 were intended as single-player levels, 30-35 were multiplayer maps, and the rest were test levels. For some of those levels there are fragmentary scripts which can be found in the [[European Mac releases]] of Oni, though we have to infer which script folders were connected with which levels based on the folders' abbreviated names. If there is any info to be gleaned from those scripts, it is described in that level's section. Here are the missing levels alongside their presumed script folder names. Click the name to jump to that section below: | ||
| Line 506: | Line 491: | ||
|- | |- | ||
|05 | |05 | ||
|[[#Airport Part Deux|The Airport Part Deux]] | |[[#The Airport Part Deux|The Airport Part Deux]] | ||
|Airport_II | |Airport_II | ||
|- | |- | ||
|07 | |07 | ||
|[[#Obsolete | |[[#Obsolete|Obsolete]] | ||
| | | | ||
|- | |- | ||
| Line 518: | Line 503: | ||
|- | |- | ||
|30 | |30 | ||
|[[#Arena of Pain|The Arena of Pain]] | |[[#The Arena of Pain|The Arena of Pain]] | ||
|aop | |aop | ||
|- | |- | ||
| Line 576: | Line 561: | ||
---- | ---- | ||
===Airport Part Deux=== | ===The Airport Part Deux=== | ||
The presence of | The accidental presence of '''Airport_II''' in some versions of Oni's IGMD folder explains why the normal IGMD folder jumps from '''Airport''' to '''Airport_III'''. The scripts in this folder are very short, so little about the level can be inferred from them. However, a mention of the animation "KONOKOlev5_outro_run" corroborates the ONLD evidence that the missing level 5 in the sequence of levelx_Final files was an intermediate airport space between two other airport levels, which are in level4_Final and level6_Final. The quote above by Chris Butcher tells us that it was an underground portion of the airport which was removed. An internal design document refers to the level as "[[wp:People mover|PEOPLEMOVER]]"; the previous and following levels are named "AIRPORT" and "RUNWAYS". | ||
---- | ---- | ||
===Obsolete=== | ===Obsolete=== | ||
This level, which would have been level7_Final, represents the gap between the end of the airport levels and the first TCTF HQ level. | This level, which would have been level7_Final, represents the gap between the end of the airport levels and the first TCTF HQ level. Although Bungie West removed its name, [[#Cut levels|we know from Hardy]] that this level is the one which was moved and is still present in the game. The identity of the level can be deduced from the fact that various animations occurring in Syndicate Mountain Compound, which is now level19, have "lev7" in their names. Confirmation comes from a leaked listing of game design documents where level 7 was titled "MOUNTAIN COMPOUND". | ||
What this implies about the original flow of the story is interesting, because the second Airport level ends with Konoko placing a tracker on Muro's plane, but the "mission complete" splashscreen abruptly informs us that it was unsuccessful. Apparently it must have worked in an earlier version of the story, considering that Konoko goes there next! It seems that Mountain Compound was not conceived as the location for a final showdown; by contrast, BGI HQ was also termed "Syndicate HQ" during development and was intended to occur near the end of the game (see {{SectionLink||BGI HQ}}). Mountain Compound was merely an intermediate stop for a strike against (probably) Muro before a counterattack was made on TCTF HQ in the following chapter. | |||
---- | ---- | ||
===BGI HQ=== | ===BGI HQ=== | ||
Below are the only four screenshots we have for the level. Similarities to the architecture in TCTF HQ have been noted, with this explanation: | Below are the only four screenshots we have for the [[BGI]] level. Similarities to the architecture in TCTF HQ have been noted, with this explanation: | ||
{{Quotebox|align=none|width=850px|source=--[http://oni.bungie.org/forum/viewtopic.php?pid=52737#p52737 Hardy LeBel]|quote=The BGI level turned into TCTF HQ. [...] [A]ll of the levels in the game ultimately ended up being composites of architectural details that were stripped from various other pieces that the architects had made. The screenshots that you have of BGI were part of [an earlier, unused] building, as were a lot of the pieces of TCTF HQ.}} | {{Quotebox|align=none|width=850px|source=--[http://oni.bungie.org/forum/viewtopic.php?pid=52737#p52737 Hardy LeBel]|quote=The BGI level turned into TCTF HQ. [...] [A]ll of the levels in the game ultimately ended up being composites of architectural details that were stripped from various other pieces that the architects had made. The screenshots that you have of BGI were part of [an earlier, unused] building, as were a lot of the pieces of TCTF HQ.}} | ||
| Line 601: | Line 586: | ||
|} | |} | ||
Significantly, internal design documents also labeled this level as "SYNDICATE HQ", and Alex Okita labeled these images as "Syndicate headquarters" in [http://jongod.oni2.net/UnarchivedFiles/ONI%20ARCHIVE%201/aic/oni400.html an art gallery prepared for AIC]. This shows that Bungie West was equating the two organizations ("joined at the hip", as [[Chung]] wrote; BGI "a front company", per [https://carnage.bungie.org/oniforum/oni.forum.pl?read=19673 this forum post] from Hardy). With no concrete level ever being placed in slots 15 or 17, and the original ending level being 18 before Mountain Compound was renumbered from level 7 to 19 to place it at the end of the game, this means that level 16, BGI/Syndicate HQ, was the [[wikt:penultimate|penultimate]] level of the game, and Oni was going to conclude with level 18, TCTF HQ Redux. | |||
However, as Hardy explained above, BGI was cannibalized for parts which were used in other levels. Additionally, the salvaged script for this level reveals only two disconnected cutscenes, implying that the level was not substantially complete. | |||
---- | ---- | ||
===Arena of Pain=== | ===The Arena of Pain=== | ||
This was an arena with an industrial center area and much cleaner/brighter outlying areas connected by walkways, seen at various stages of development or in various flavors. This level also featured heavily in mid-development video footage (see {{SectionLink||Video footage}}). | |||
{| style="width:650px;" | {| style="width:650px;" | ||
|+'''Industrial area''' | |||
|[[Image:MP arena 1-1.jpg|320px]] | |[[Image:MP arena 1-1.jpg|320px]] | ||
|[[Image:MP arena 1-2.jpg|320px]] | |[[Image:MP arena 1-2.jpg|320px]] | ||
|[[Image:MP arena 1-7.jpg|320px]] | |||
|- | |- | ||
|[[Image:MP arena 1-3.jpg|320px]] | |[[Image:MP arena 1-3.jpg|320px]] | ||
|[[Image:MP arena 1-4.jpg|320px]] | |[[Image:MP arena 1-4.jpg|320px]] | ||
|[[Image:MP arena 1-5.jpg|320px]] | |[[Image:MP arena 1-5.jpg|320px]] | ||
|- | |- | ||
|[[Image:1999 Trailer - MP arena 1-7.jpg]] | |||
| | | | ||
| | | | ||
|} | |} | ||
{| | {| style="width:650px;" | ||
|+'''Clean area''' | |||
|[[Image:Arena of Pain 1.jpg]] | |[[Image:Arena of Pain 1.jpg]] | ||
|[[Image:Arena of Pain 2.jpg]] | |[[Image:Arena of Pain 2.jpg]] | ||
|[[Image:Arena of Pain 3.jpg]] | |[[Image:Arena of Pain 3.jpg]] | ||
|- | |- | ||
|[[Image:MP arena 1-6.jpg|320px]] | |||
|[[Image:Arena of Pain 4.jpg|320px]] | |||
| | |||
|- | |- | ||
| colspan="3" | In | | colspan="3" | In the first three shots, the wall seen on the left appears to say "[DA]VES [AR]ENA of PAiN", which if true would refer to Dave Dunn the level modeler. | ||
|} | |} | ||
| Line 645: | Line 638: | ||
|[[Image:Pre-beta Muro vs. Konoko.jpg|320px]] | |[[Image:Pre-beta Muro vs. Konoko.jpg|320px]] | ||
|[[Image:Pre-beta Muro vs. Konoko 2.jpg|320px]] | |[[Image:Pre-beta Muro vs. Konoko 2.jpg|320px]] | ||
|[[Image:Pre-beta Muro vs. Konoko 3.jpg|320px]] | |||
|- | |- | ||
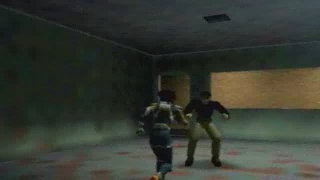
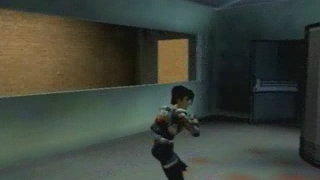
| colspan=" | | colspan="3" | Alex Okita remembered this as "Just a bunch of tubes"; "It was pretty big, lots of falling and dying, from what I remember". The cross-beams are also reminiscent of Construction Pit. | ||
|} | |} | ||
| Line 658: | Line 652: | ||
|[[Image:Pit1.jpg|320px]] | |[[Image:Pit1.jpg|320px]] | ||
|[[Image:Pit2.jpg|320px]] | |[[Image:Pit2.jpg|320px]] | ||
|[[Image:Pit3.jpg|320px]] | |||
|} | |} | ||
| Line 667: | Line 660: | ||
|[[Image:MP arena 2-1.jpg|320px]] | |[[Image:MP arena 2-1.jpg|320px]] | ||
|[[Image:MP arena 2-2.jpg|320px]] | |[[Image:MP arena 2-2.jpg|320px]] | ||
|[[Image:MP arena 2-3.jpg|320px]] | |||
|- | |- | ||
|[[Image:MP arena 2-4 with Iron Demon.jpg|320px]] | |[[Image:MP arena 2-4 with Iron Demon.jpg|320px]] | ||
|[[Image:Pit4.jpg|320px]] | |[[Image:Pit4.jpg|320px]] | ||
|[[Image:Pre-beta blood.jpg|320px]] | |[[Image:Pre-beta blood.jpg|320px]] | ||
|- | |- | ||
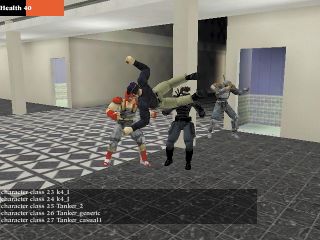
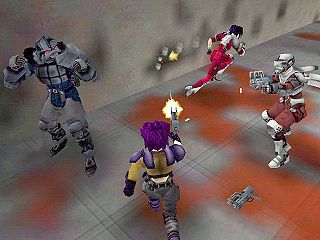
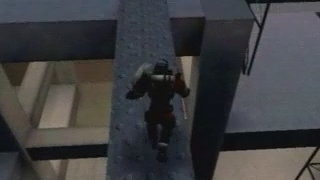
| colspan=" | | colspan="3" | The first three pictures show some basic elements of the level's architecture (most notably, very steep stairs). The third picture shows [[Konoko]] knocking down an early [[Tanker]], with what looks like a collision glitch. The fourth picture is a rare glimpse at the [[Iron Demon]]. | ||
|} | |} | ||
| Line 682: | Line 674: | ||
|[[Image:1999 Trailer - MP arena 2-05.jpg]] | |[[Image:1999 Trailer - MP arena 2-05.jpg]] | ||
|[[Image:1999 Trailer - MP arena 2-06.jpg]] | |[[Image:1999 Trailer - MP arena 2-06.jpg]] | ||
|[[Image:1999 Trailer - MP arena 2-07.jpg]] | |||
|- | |- | ||
|[[Image:1999 Trailer - MP arena 2-08.jpg]] | |[[Image:1999 Trailer - MP arena 2-08.jpg]] | ||
|[[Image:1999 Trailer - MP arena 2-09.jpg]] | |[[Image:1999 Trailer - MP arena 2-09.jpg]] | ||
|[[Image:1999 Trailer - MP arena 2-10.jpg]] | |[[Image:1999 Trailer - MP arena 2-10.jpg]] | ||
| Line 691: | Line 682: | ||
|[[Image:1999 Trailer - MP arena 2-11.jpg]] | |[[Image:1999 Trailer - MP arena 2-11.jpg]] | ||
|[[Image:1999 Trailer - MP arena 2-12.jpg]] | |[[Image:1999 Trailer - MP arena 2-12.jpg]] | ||
|[[Image:1999 Trailer - MP arena 2-13.jpg]] | |||
|- | |- | ||
|[[Image:1999 Trailer - MP arena 2-14.jpg]] | |[[Image:1999 Trailer - MP arena 2-14.jpg]] | ||
|[[Image:1999 Trailer - MP arena 2-15.jpg]] | |[[Image:1999 Trailer - MP arena 2-15.jpg]] | ||
|[[Image:1999 Trailer - MP arena 2-16.jpg]] | |[[Image:1999 Trailer - MP arena 2-16.jpg]] | ||
| Line 700: | Line 690: | ||
|[[Image:1999 Trailer - MP arena 2-17.jpg]] | |[[Image:1999 Trailer - MP arena 2-17.jpg]] | ||
|[[Image:1999 Trailer - MP arena 2-18.jpg]] | |[[Image:1999 Trailer - MP arena 2-18.jpg]] | ||
|[[Image:1999 Trailer - MP arena 2-19.jpg]] | |||
|- | |- | ||
|[[Image:1999 Trailer - MP arena 2-20.jpg]] | |[[Image:1999 Trailer - MP arena 2-20.jpg]] | ||
|[[Image:1999 Trailer - MP arena 2-21.jpg]] | |[[Image:1999 Trailer - MP arena 2-21.jpg]] | ||
|[[Image:1999 Trailer - MP arena 2-22.jpg]] | |[[Image:1999 Trailer - MP arena 2-22.jpg]] | ||
| Line 709: | Line 698: | ||
|[[Image:1999 Trailer - MP arena 2-23.jpg]] | |[[Image:1999 Trailer - MP arena 2-23.jpg]] | ||
|[[Image:1999 Trailer - MP arena 2-24.jpg]] | |[[Image:1999 Trailer - MP arena 2-24.jpg]] | ||
|[[Image:1999 Trailer - MP arena 2-25.jpg]] | |||
|- | |- | ||
| | | colspan="3" | [[Image:1999 Trailer - MP arena 2-26.jpg]] | ||
|[[Image:1999 Trailer - MP arena 2-26.jpg]] | |||
|} | |} | ||
| Line 719: | Line 708: | ||
|align="center"|[[Image:Pre-beta enigma 5 cropped.jpg]] | |align="center"|[[Image:Pre-beta enigma 5 cropped.jpg]] | ||
|- | |- | ||
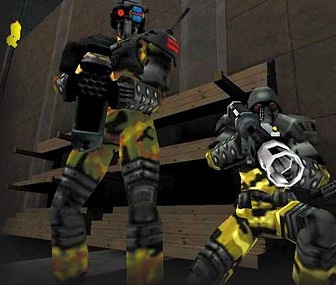
|A region of The Pit, identifiable by the shared wall texture. Lumber is stacked in the background (this is a construction zone, after all). This is possibly our only screenshot showing an over-the-shoulder weapon animation variant which we no longer have. The yellow blob in the distant top-left corner is probably a relic flame particle that's still in the game, but drawn incorrectly due to a graphics bug. | |A region of The Pit, identifiable by the shared wall texture. Lumber is stacked in the background (this is a construction zone, after all). This is possibly our only screenshot showing an over-the-shoulder weapon animation variant which we no longer have. The camo Strikers are also a notably pre-beta-only variant. The yellow blob in the distant top-left corner is probably a relic flame particle that's still in the game, but drawn incorrectly due to a graphics bug. | ||
|} | |} | ||
| Line 746: | Line 735: | ||
---- | ---- | ||
==Cut weapons== | ==Cut weapons== | ||
{| style="width:650px | ===Shibume auto-pistol=== | ||
{| style="width:650px;" | |||
| colspan="2" align="center" | [[Image:Genesis Level3 8.jpg]] | | colspan="2" align="center" | [[Image:Genesis Level3 8.jpg]] | ||
|- | |- | ||
| colspan="2" | This now-extinct pistol was seen all over the place back when Bungie was taking pre-beta screenshots. This was the [[ | | colspan="2" | This now-extinct pistol was seen all over the place back when Bungie was taking pre-beta screenshots. This was the [[Konoko's gun#Shibume SH-40|Shibume SH-40]], a fully-automatic pistol that fired 10 rounds/sec. | ||
|} | |} | ||
===Belt-fed SMG=== | |||
{| style="width:650px | {| style="width:650px;" | ||
|[[Image:Compound4.jpg|320px]] | |[[Image:Compound4.jpg|320px]] | ||
|[[Image:Vago8.jpg|320px]] | |[[Image:Vago8.jpg|320px]] | ||
| Line 760: | Line 750: | ||
|} | |} | ||
===Multi-rocket launcher=== | |||
{| style="width:650px | {| style="width:650px;" | ||
|[[Image:Early scram cannon 1.jpg]] | |[[Image:Early scram cannon 1.jpg]] | ||
|[[Image:Early scram cannon 2.jpg]] | |[[Image:Early scram cannon 2.jpg]] | ||
|- | |||
| colspan="2" | [[Image:MP arena 1-5.jpg]] | |||
|- | |- | ||
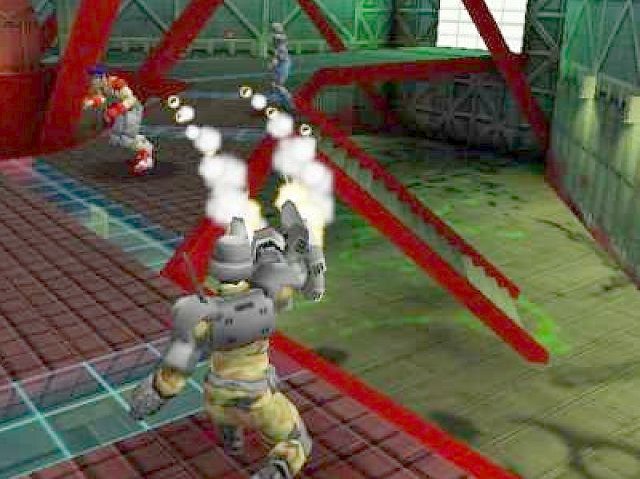
| colspan="2" | The Iron Demon can be seen firing this weapon in the trailer at 1:25; [http://oni.bungie.org/special/part1/alex.html apparently] Konoko would salvage the gun from the ID after destroying it. Although fans were impressed by its size, some also wanted to know how petite Konoko could even hold the thing. Okita joked that it was filled with anti-gravity. This was probably the basis for the (much smaller) [[Quotes/Weapons#scramble|Scram Cannon]]. | | colspan="2" | The Iron Demon can be seen firing this weapon in the trailer at 1:25; [http://oni.bungie.org/special/part1/alex.html apparently] Konoko would salvage the gun from the ID after destroying it. Although fans were impressed by its size, some also wanted to know how petite Konoko could even hold the thing. Okita joked that it was filled with anti-gravity. This was probably the basis for the (much smaller) [[Quotes/Weapons#scramble|Scram Cannon]]. | ||
|} | |} | ||
===Energy pistol=== | |||
{| style="width:650px;" | {| style="width:650px;" | ||
|[[Image:Pre-beta Airport 2.jpg]] | |[[Image:Pre-beta Airport 2.jpg]] | ||
Latest revision as of 19:51, 10 May 2025
- This article focuses on differences in the assets of pre-beta Oni. See the Pre-beta features article for features removed from Oni during development.
Almost all available shots of pre-beta content are here, compared to final content when applicable. Most pictures are half-sized (click to enlarge).
Released levels
Decline in appearance
Fans have sometimes observed that earlier versions of Oni's levels as seen in pre-release screenshots and the 1999 trailer looked sharper or more detailed than the release versions. The reasons for these differences are given in these three posts by the game's Design Lead:
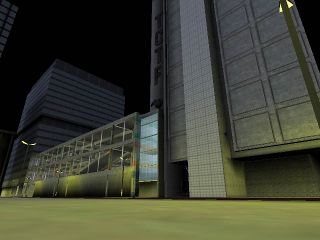
There was no conflict between anybody. It was just that early versions of the story called for certain locations and (before they knew any better) the architects went ahead and modelled them as "real" spaces (you shoulda seen the fully modelled toilets...very impresisve!). We basically had to go back into every level of the game and completely rip it apart to support the gameplay we were going for or else build them new from scratch.
All of the levels were remodelled in a short period of time. Higher detail environments were typically the ones that needed less changing. [...] I do remember that there was discussion at one point about the fact that every level started to get the bluish tint because they were all "high-tech". Perhaps that led to the new palette.
As I said, glass (and the glass-breaking effects) was often stripped out of the levels for performance reasons. That particular iteration of the TCTF lobby was reduced to a crawl because of all the glass. Also the glass retaining walls and bannisters didn't provide any cover for gunfights from one ledge to the other, so they were replaced by the low walls.
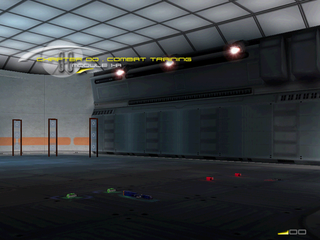
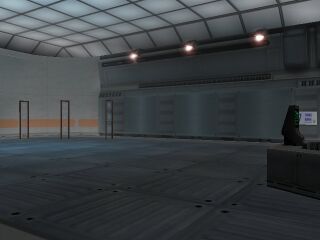
Combat Training
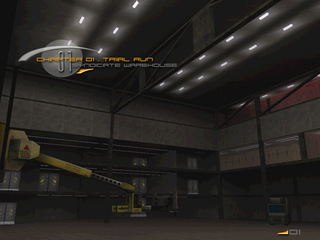
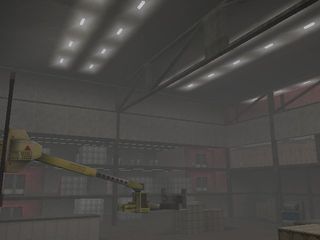
Syndicate Warehouse
There are 15 hidden doors there. When revealed, they turn this very linear level into a completely non-linear structure (more like a real warehouse).
Musashi Manufacturing Plant
This one has evolved quite a lot.
|
|
|
|
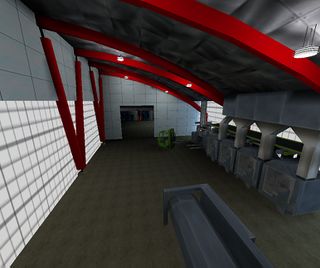
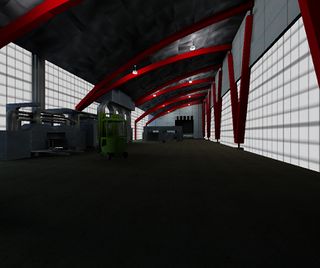
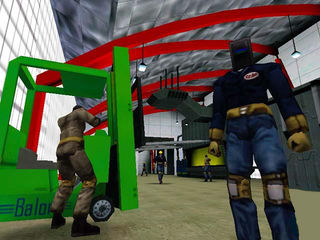
| There was more conventional warehouse machinery in here back then. "Balor" is a reference to Myth, still seen in Chapter 1 of the final game. | |
|
|
|
|
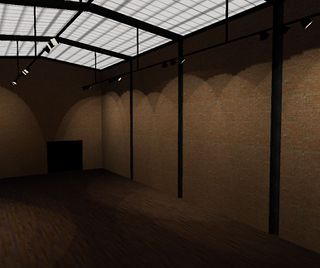
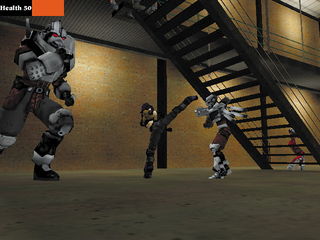
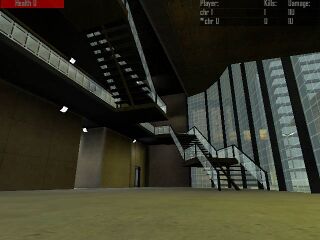
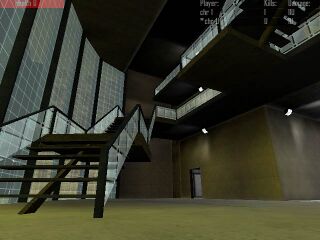
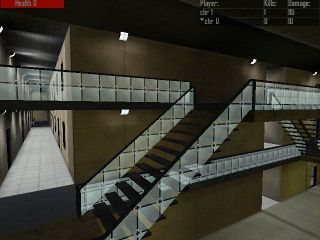
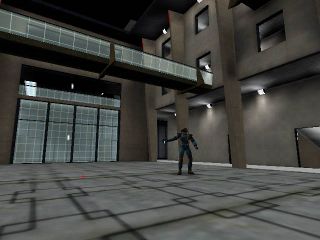
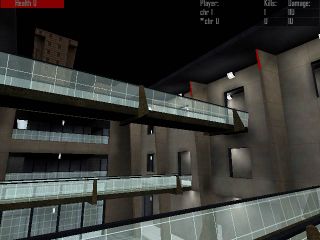
| The last picture has a very provisional-looking health bar; these are some early screenshots. Nevertheless they include an extravagant amount of lightmapping, discussed in the Pre-beta features article. (Light sources are actually visible in the first picture, hidden in the other three.) This room may in fact be unrelated to Musashi, despite similar-looking stairs. | |
|
|
|
|
|
|
|
|
|
| ||
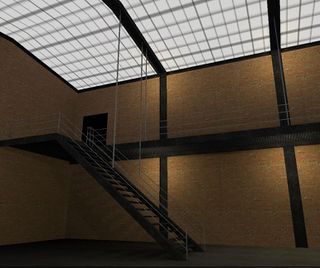
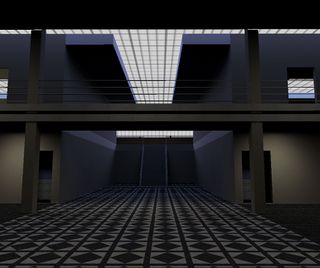
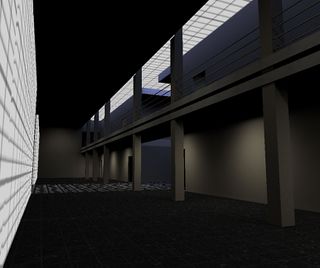
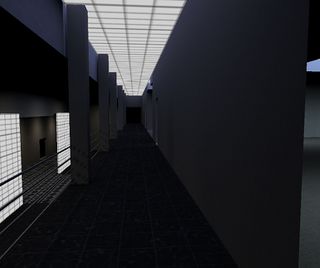
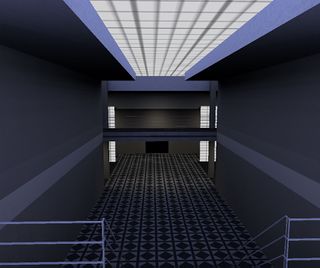
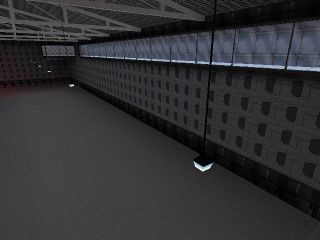
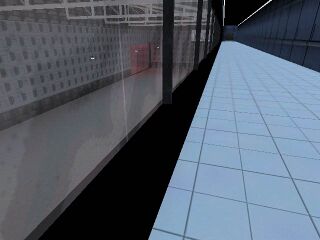
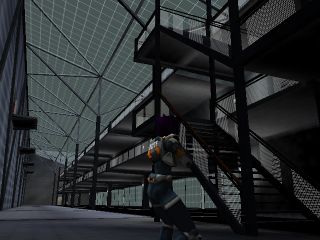
| The stairs lead up to the offices. More lightmapping here, adding volume to the barely-textured level. | ||
Vago Bio-Research Lab
This one has kept the same basic layout, but there were a few changes. The most distinct difference is the night-time setting.
|
|
|
|
|
|
|
|
|
| The interior is only done in one half of the lab. There are also pillars and foyer doors missing, and extra ledges along the sides of the area where you fight Barabas. | ||
|
|
|
|
|
|
|
|
|
| There were stools for the scientists... apart from that, this wing is pretty much final. | ||
|
|
| The final ones are much thinner, and the layout of the stairs and catwalks is different. | |
Vansam Regional Airport
|
| This could be the "Arrivals" section (which is now completely empty). |
TCTF Regional Headquarters
| |
|
|
|
|
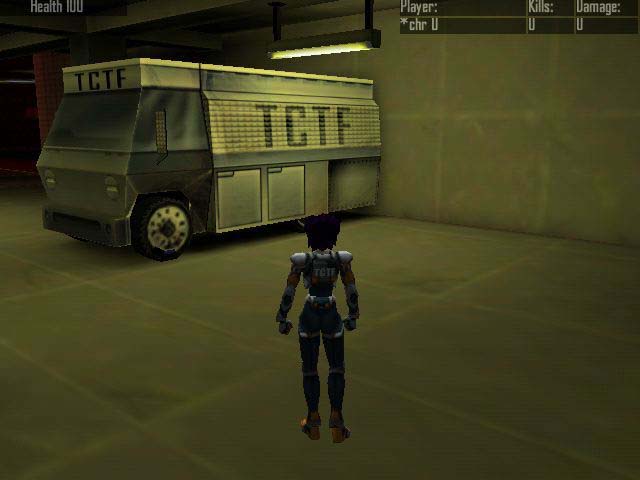
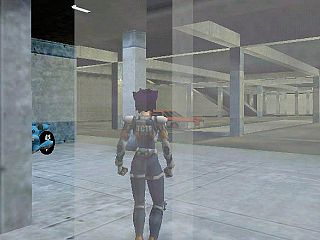
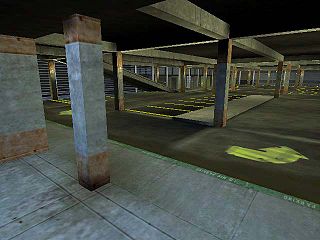
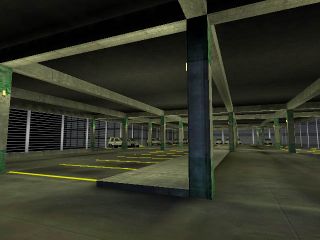
| Some different vehicles. Different transition from the parking lot to the main building. Konoko's bike is parked nicely in the second shot, instead of laying on the floor. | |
| |
|
|
|
|
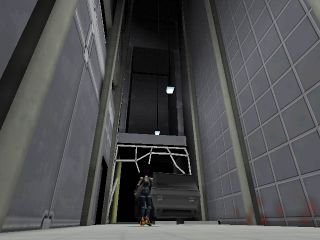
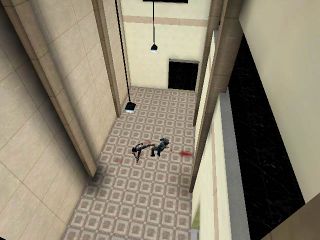
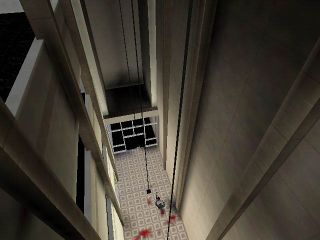
| The room is more than 2 times wider now. There are windows on the right and catwalks running across the far side. The entrance door changed a lot, but the van didn't change much... | |
|
|
|

|
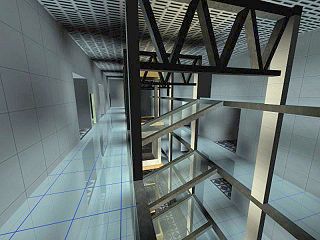
| The elevator was between the two sets of ramps. Solid floors had a tiling pattern, and ramps were transparent. | |
|
|
|
Atmospheric Conversion Center
|
|
|
|
|
|
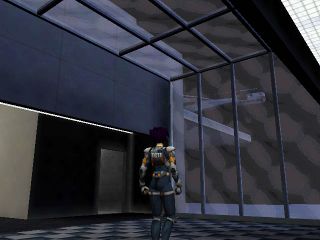
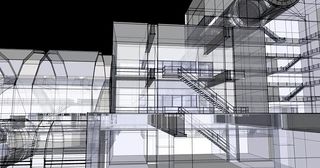
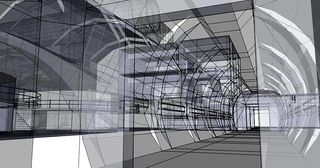
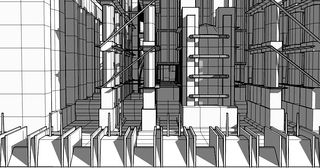
| These shots are probably from the time when this was an electric plant. Note that the giant tube that serves as the end of the level (seen in the first pic) has a floor to walk on, in place of the electrified beam suspended in the middle, which Konoko runs down while being pursued by the TCTF. The pipe is also connected directly to the building, rather than being at the top of an elevator shaft. In the current version of the level, the mid-air beam is also the shaft for the giant fan; adding the fan was probably a hasty improvisation to make the level seem more like an ACC and less like an electric plant... but the fan shaft is still electrified! | ||
Regional State Building
Hardy once stated that RSB was the first building that Bungie completed. Apparently that is also why it's been through so many changes.
|
|
|
|
|
|
|
|
|
|
|
|
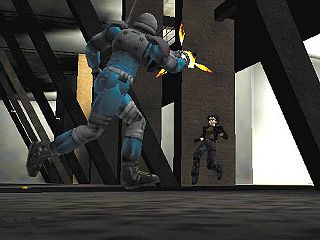
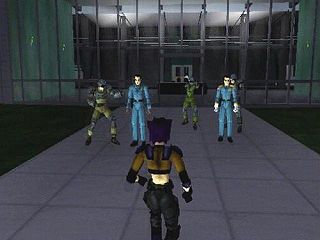
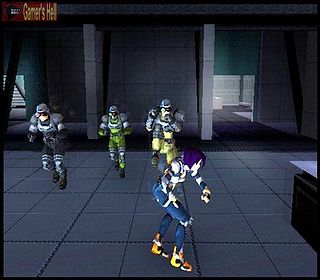
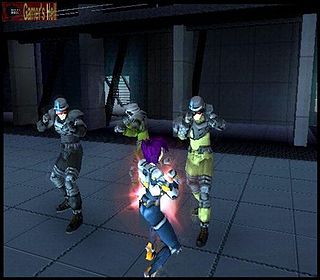
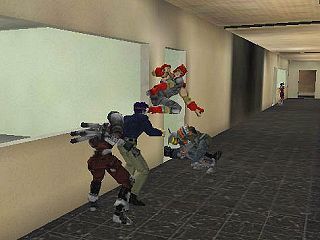
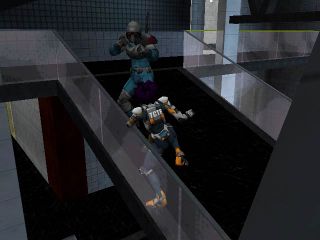
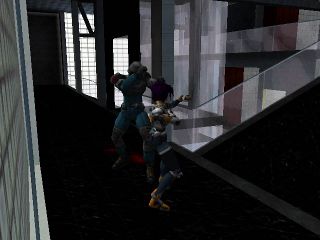
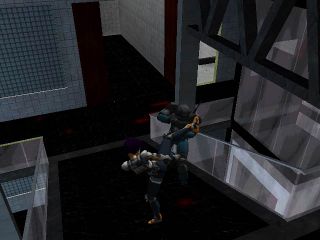
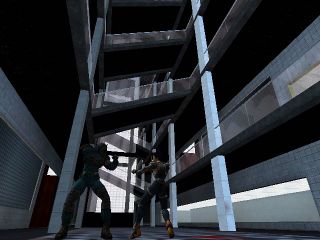
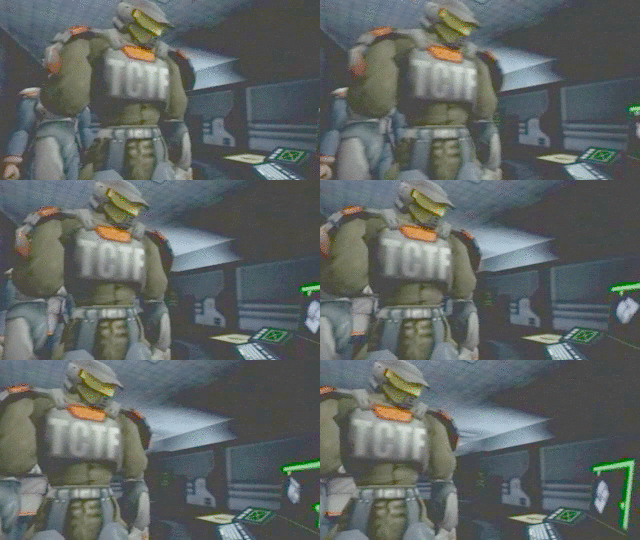
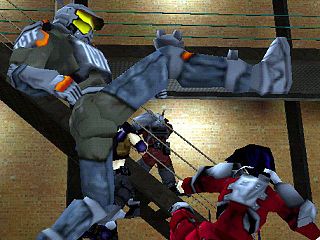
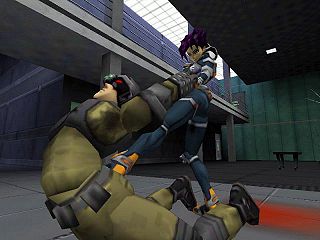
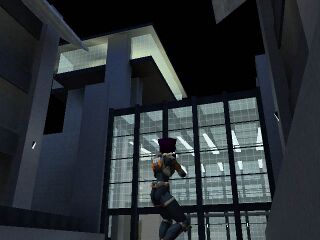
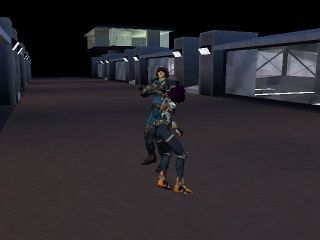
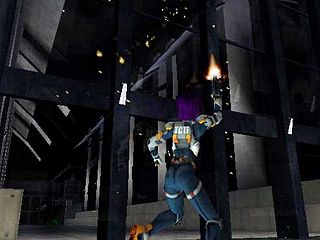
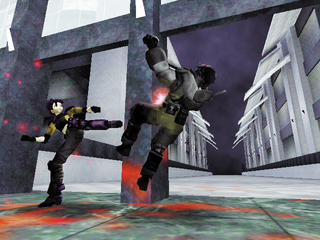
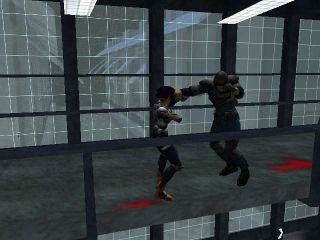
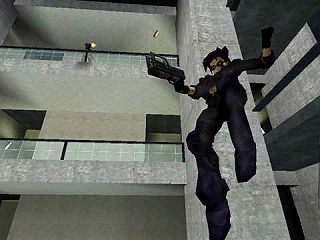
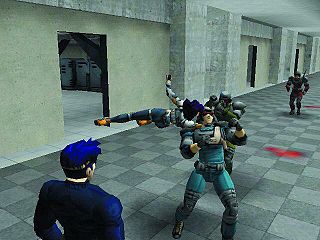
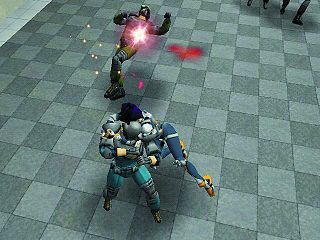
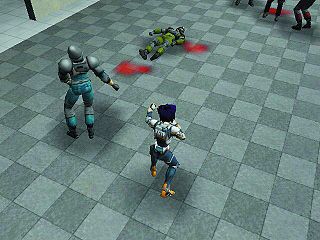
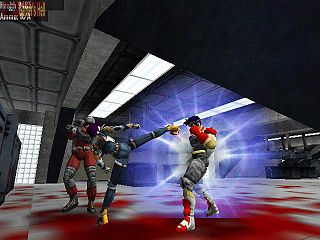
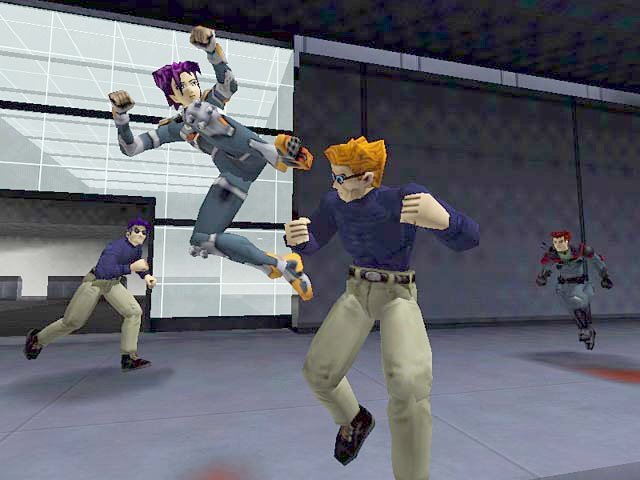
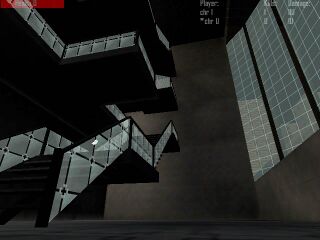
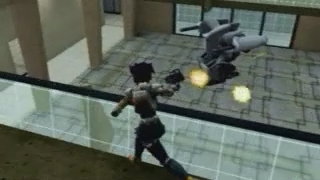
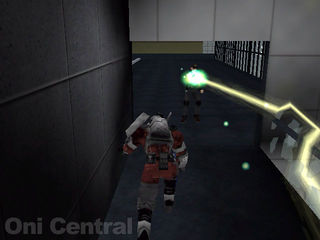
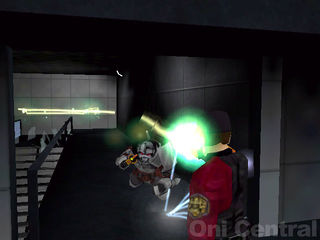
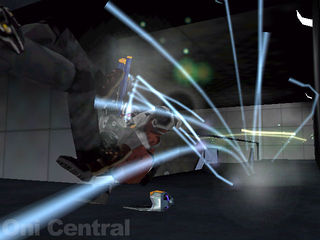
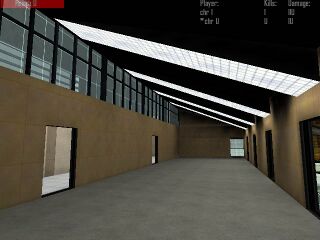
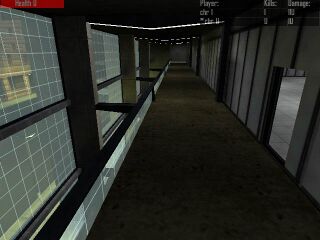
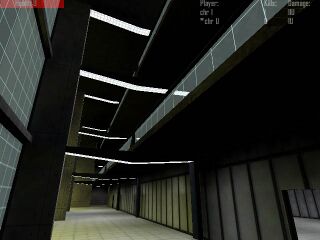
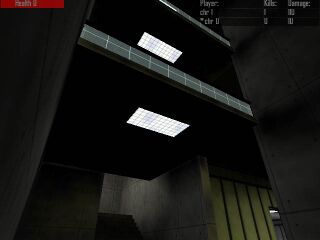
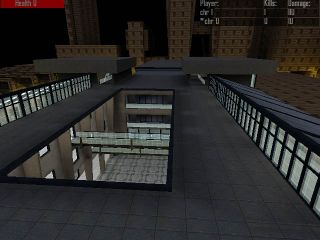
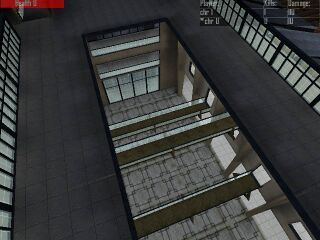
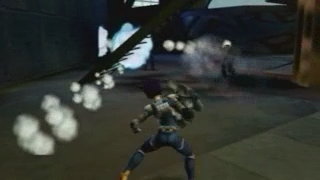
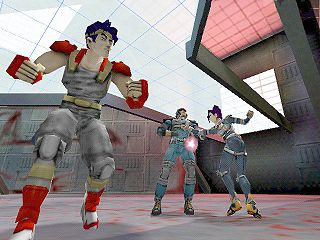
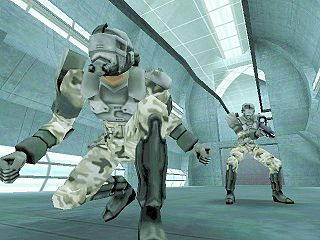
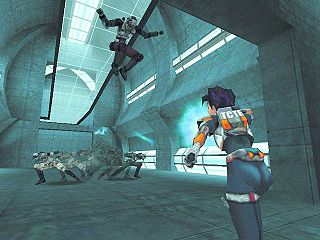
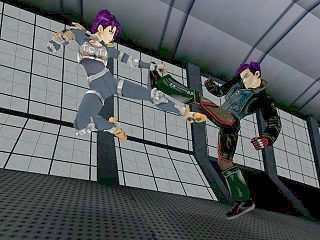
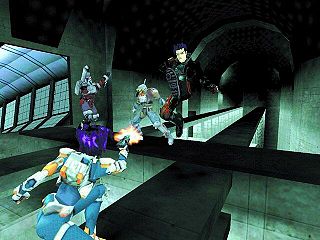
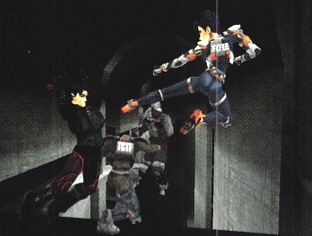
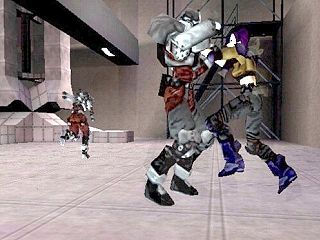
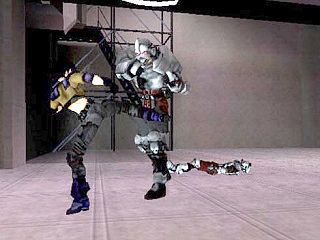
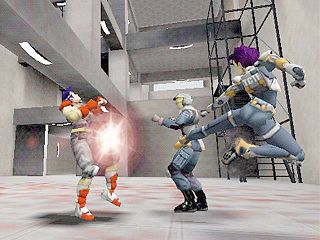
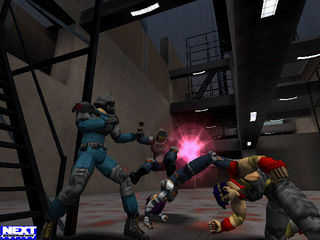
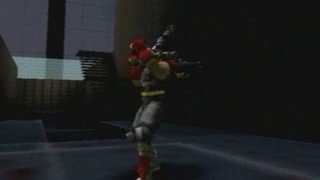
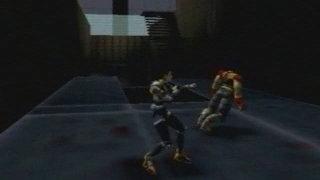
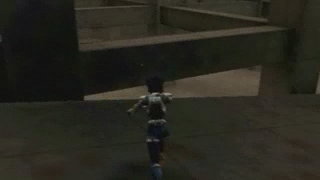
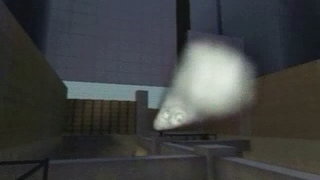
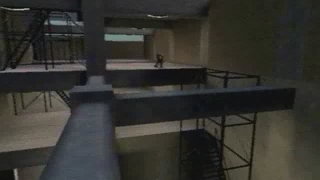
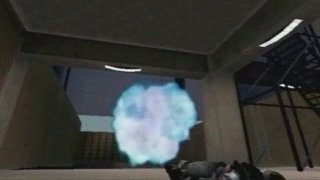
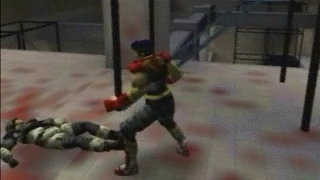
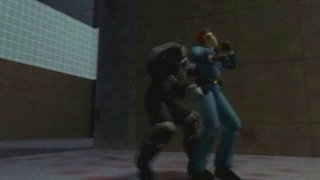
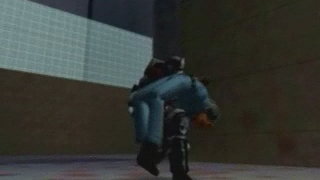
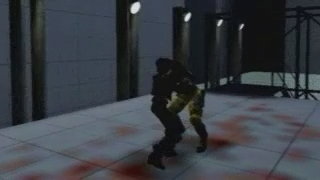
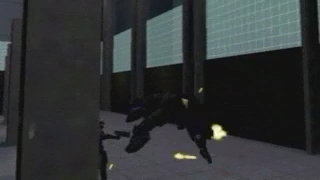
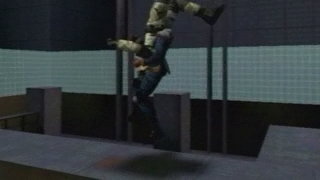
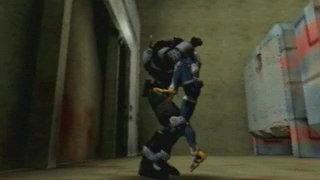
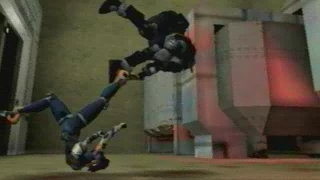
| These stills are from a long-lost show floor trailer. It can be seen playing in the background of the video Harry made at Macworld NY in 2000 (see § Video footage), and was also described textually on the forum. An energy effect no longer used in Oni can be seen emanating from two points in image 1; we might think these are the impact locations of the Plasma Rifle's shots, however we can see the pre-beta impact effect of the Plasma Rifle at 10 seconds into the video mentioned earlier, and it's quite different: it breaks up into smaller plasma balls flying in different directions.
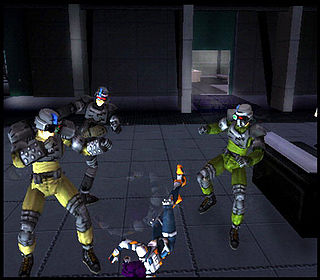
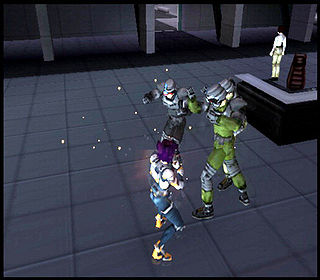
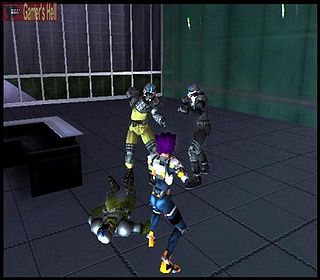
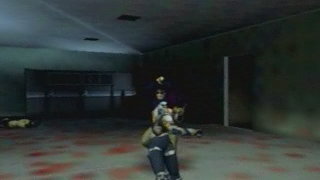
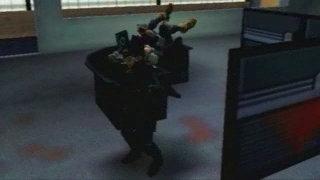
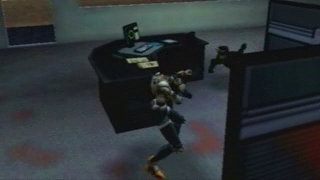
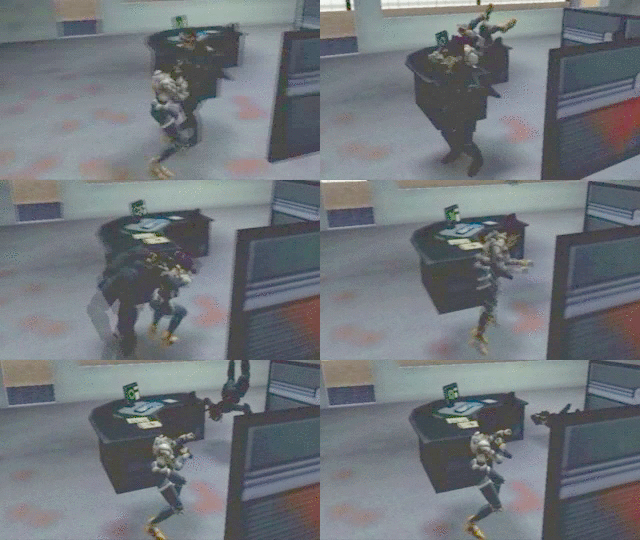
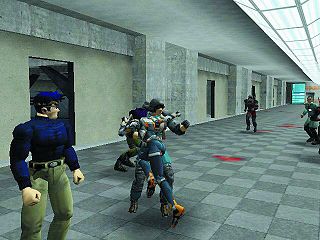
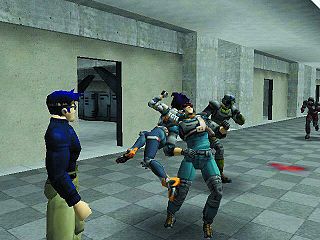
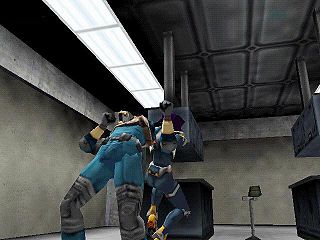
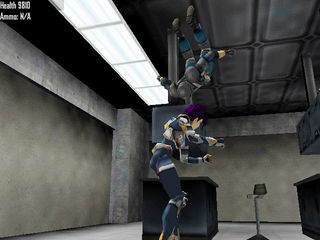
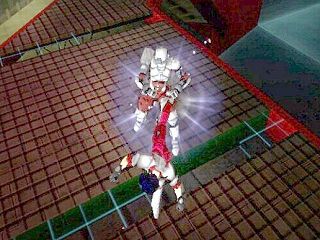
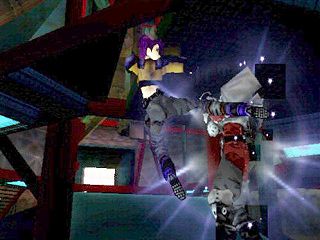
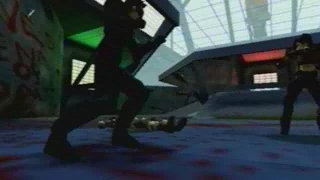
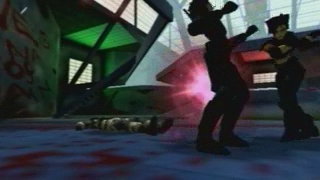
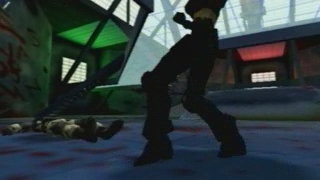
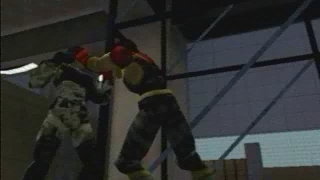
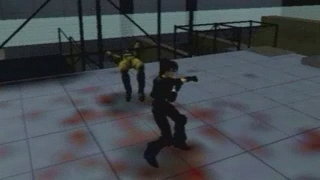
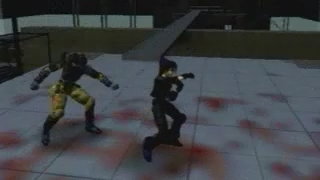
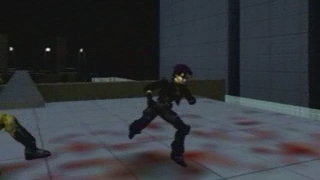
Images 2–4 show a sequence from multiple angles in which an Elite Striker dives to the floor to dodge enemy gunfire, then gets up and uses his Cannonball Roll on the Security Guard. In images 3 and 4, there is a different mystery effect emanating from the floor, either the result of the Security Guard's PSP stream impacting the Striker or a particle formerly attached to the Cannonball Roll. | |
|
|
|
|
|
|
|

|

|
|
|
|
|
|
|
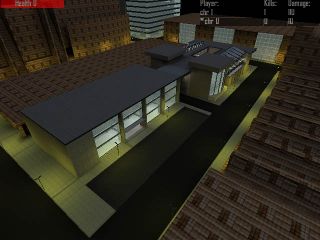
|
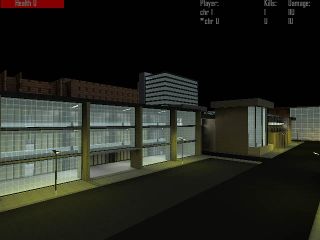
|
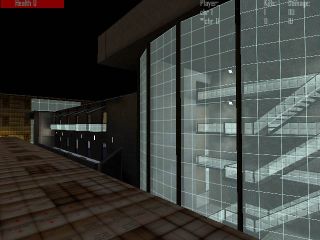
|
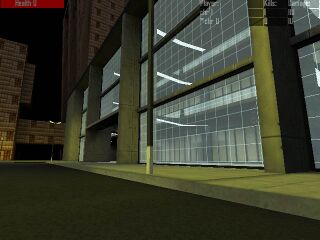
|
|
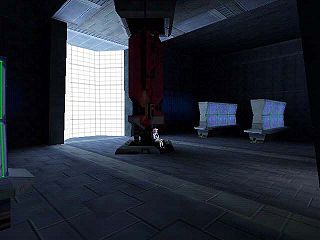
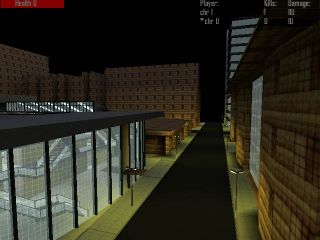
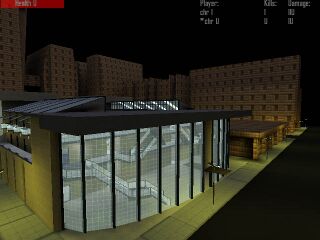
| By the time Bungie took the outside shot with the Iron Demon, they'd barred in the foyer. Also, notice the missing wall of glass in the last set of pics. This section is now occupied by a wall with a normal-sized door set in the middle of it. The original wide-open entrance is an odd design choice. Could it have been a pet door for the Iron Demon? Most likely the giant robot was only shown in this level because it was their "testbed" level, since the mech was really meant for BGI HQ, but perhaps an initial skirmish was once planned here. Finally, note the multiplayer HUD in the top-right of many of these pictures; the screenshot taker was in MP mode at the time. | ||
Rooftops
TCTF Science Prison
|
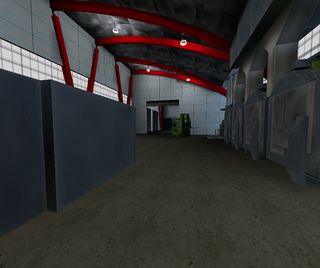
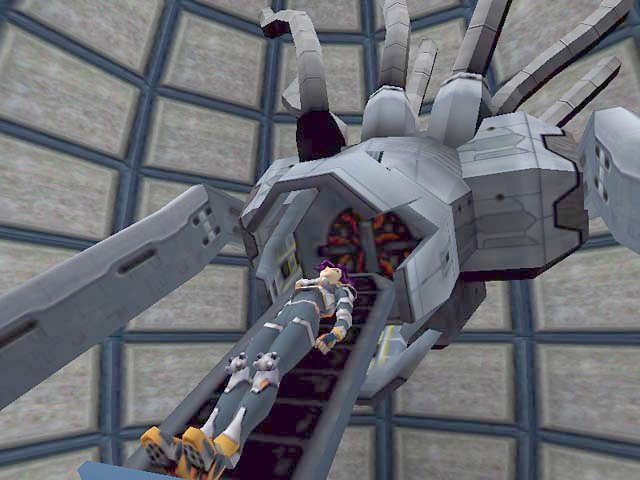
| New wall textures. Looks like the scanner's textures are actually higher-res than what we have now. |
Syndicate Mountain Compound
| Pre-beta | Now |
|---|---|
|
|
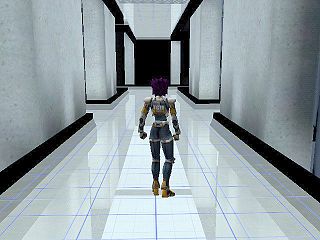
|
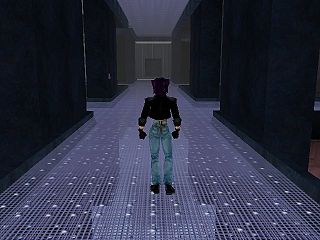
|
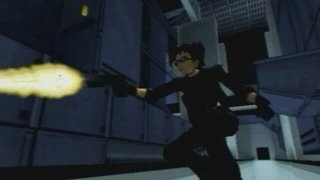
|
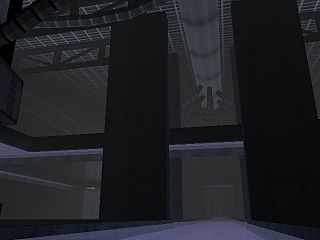
|
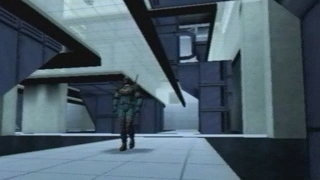
|
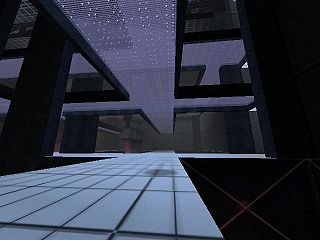
|
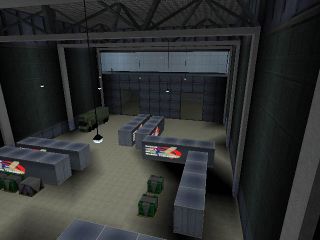
|
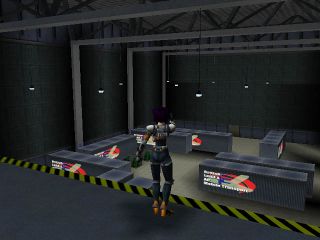
|
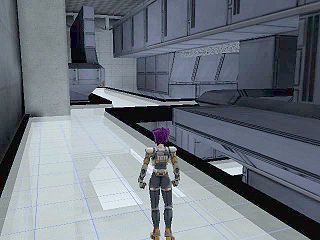
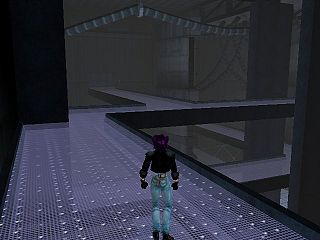
| Apparently the Syndicate is also in league with BLAM Transport Inc.! Another BGI front?
("Blam" was a Bungie in-joke as well as Oni's unexpected quit dialog in Windows.) | |
|
|
| |
| In these pictures from early development, the general concept is in place but the ceiling layout (slope, girders) is different and the room size is larger overall. | |
Cut levels
When Oni first shipped, players poking around the game data folder immediately noticed something odd: some of the levels were missing! At least, that's how it seemed based on the gaps in the numbering of the *_Final.dat/.raw(/.sep) files: there was no level5, level7, and no level15, level16 or level17 either. These gaps were explained simply by Hardy LeBel (Design Lead) and Chris Butcher (AI programmer):
The change in the level numbering came because the story completely changed from the old stuff into the form that you now know. After the changes one level was out of sequence in the story. It was easier to simply rename that one level in the data and leave a gap rather than rename all the levels to support the new story sequence.
the term "removed" is a little misleading... it's not as if oni had 19 complete levels, and we just decided to leave five of them off the CD. levels 7, 15 and 16 were never more than a name and number. the other two (5: airport underground, and 17: bgi hq) were only partly modelled before being discarded in favor of reworking the existing environments to include those elements. with few exceptions, all of the cool stuff that we created made it into the game.
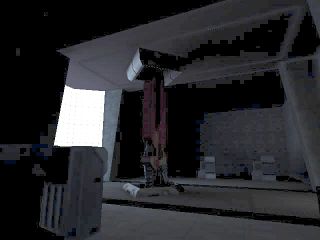
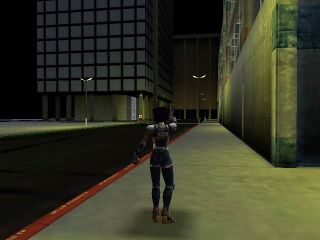
Butcher's recollection is slightly off, as we'll see below; the levels which never existed in any substantial way were 15 and 17, and BGI HQ was 16. The results of our investigation below are that the missing level5 was indeed another airport level, level7 was relocated to another slot (see § Obsolete), 15 and 17 were the levels that never really existed, and 16 was very incomplete (see § BGI HQ).
Names of these levels
Speaking of names and numbers, this information for a level is stored in a resource called ONLD in the global level file level0_Final so that the Load Game screen can display all the levels. Surprisingly, the ONLDs for some missing levels are still present in retail versions of Oni. These levels do not show in the Load Game list because the actual level data is absent, but the extracted names and numbers from their ONLDs are found below.
It appears that levels below 20 were intended as single-player levels, 30-35 were multiplayer maps, and the rest were test levels. For some of those levels there are fragmentary scripts which can be found in the European Mac releases of Oni, though we have to infer which script folders were connected with which levels based on the folders' abbreviated names. If there is any info to be gleaned from those scripts, it is described in that level's section. Here are the missing levels alongside their presumed script folder names. Click the name to jump to that section below:
| # | Name | BSL |
|---|---|---|
| 05 | The Airport Part Deux | Airport_II |
| 07 | Obsolete | |
| 16 | BGI HQ | BGI |
| 30 | The Arena of Pain | aop |
| 31 | Crossing Zone | CZ |
| 32 | Pit | pit |
| 33 | Crossing Zone Too | CZ_II |
| 34 | Capture | cap |
| 35 | Territories | |
| 36 | Test_Stuff | |
| 55 | AlexTestSite | ats |
| 66 | Experimental_II | |
| 68 | MARTY'S SOUND CORRIDOR | |
| 71 | FiringRange | SR |
| 77 | One Room | |
| 88 | One Room 2 | |
| 99 | Test Barn II |
The Airport Part Deux
The accidental presence of Airport_II in some versions of Oni's IGMD folder explains why the normal IGMD folder jumps from Airport to Airport_III. The scripts in this folder are very short, so little about the level can be inferred from them. However, a mention of the animation "KONOKOlev5_outro_run" corroborates the ONLD evidence that the missing level 5 in the sequence of levelx_Final files was an intermediate airport space between two other airport levels, which are in level4_Final and level6_Final. The quote above by Chris Butcher tells us that it was an underground portion of the airport which was removed. An internal design document refers to the level as "PEOPLEMOVER"; the previous and following levels are named "AIRPORT" and "RUNWAYS".
Obsolete
This level, which would have been level7_Final, represents the gap between the end of the airport levels and the first TCTF HQ level. Although Bungie West removed its name, we know from Hardy that this level is the one which was moved and is still present in the game. The identity of the level can be deduced from the fact that various animations occurring in Syndicate Mountain Compound, which is now level19, have "lev7" in their names. Confirmation comes from a leaked listing of game design documents where level 7 was titled "MOUNTAIN COMPOUND".
What this implies about the original flow of the story is interesting, because the second Airport level ends with Konoko placing a tracker on Muro's plane, but the "mission complete" splashscreen abruptly informs us that it was unsuccessful. Apparently it must have worked in an earlier version of the story, considering that Konoko goes there next! It seems that Mountain Compound was not conceived as the location for a final showdown; by contrast, BGI HQ was also termed "Syndicate HQ" during development and was intended to occur near the end of the game (see § BGI HQ). Mountain Compound was merely an intermediate stop for a strike against (probably) Muro before a counterattack was made on TCTF HQ in the following chapter.
BGI HQ
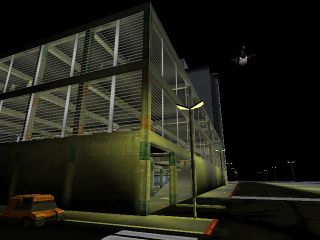
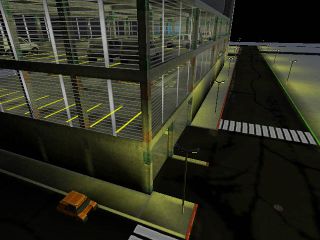
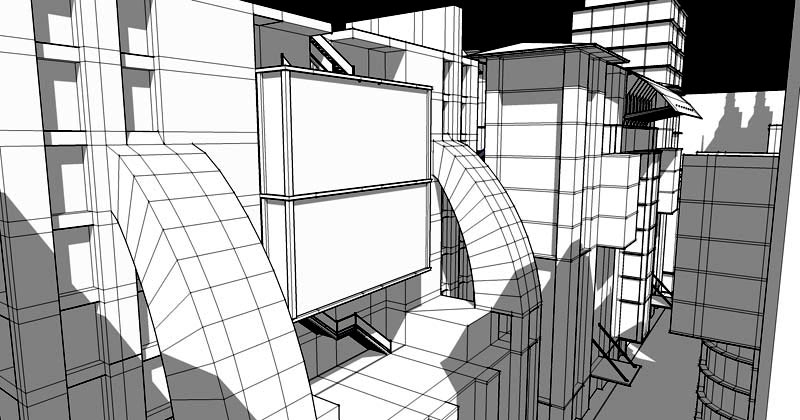
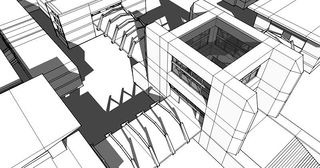
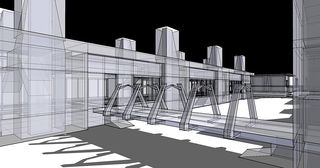
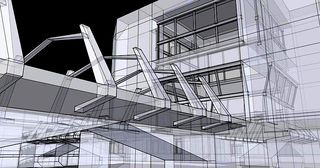
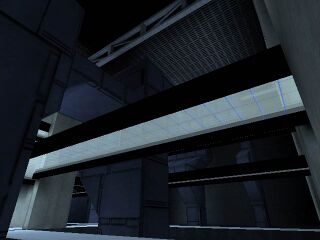
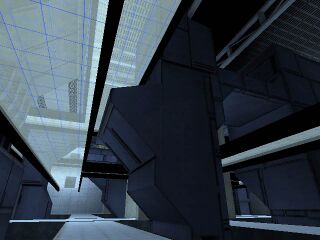
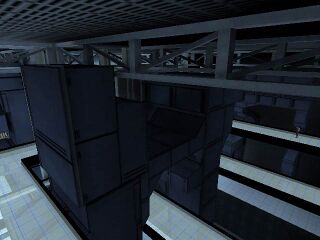
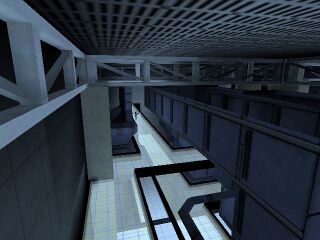
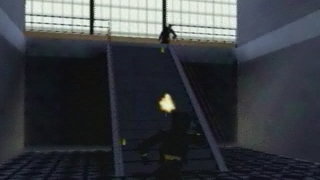
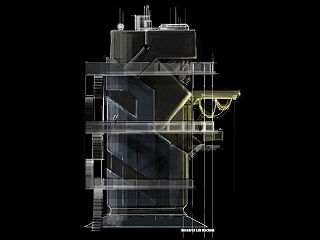
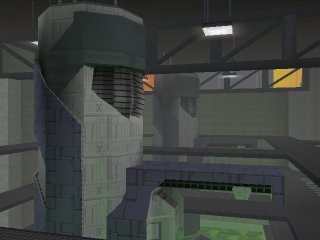
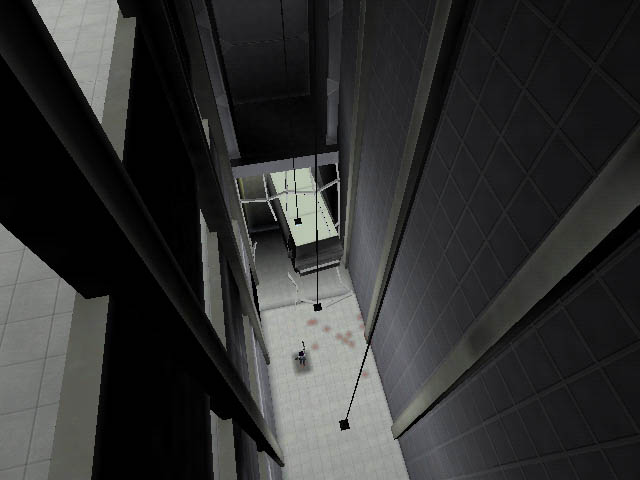
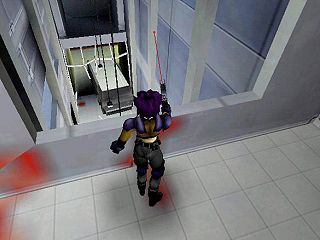
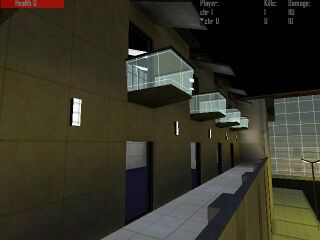
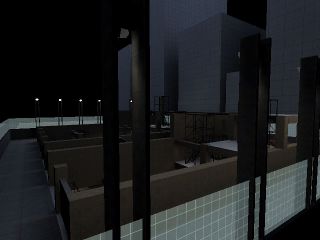
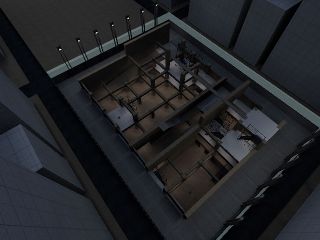
Below are the only four screenshots we have for the BGI level. Similarities to the architecture in TCTF HQ have been noted, with this explanation:
The BGI level turned into TCTF HQ. [...] [A]ll of the levels in the game ultimately ended up being composites of architectural details that were stripped from various other pieces that the architects had made. The screenshots that you have of BGI were part of [an earlier, unused] building, as were a lot of the pieces of TCTF HQ.
|
|
|
|
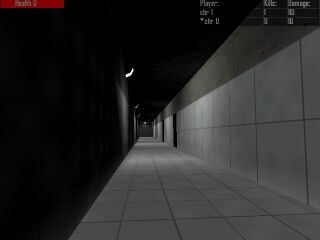
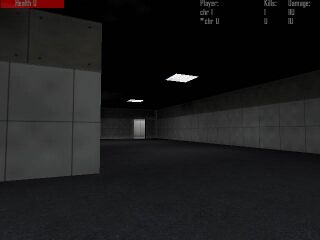
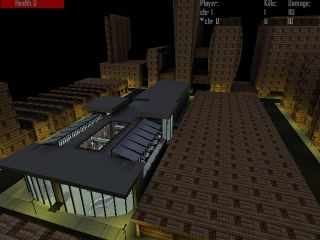
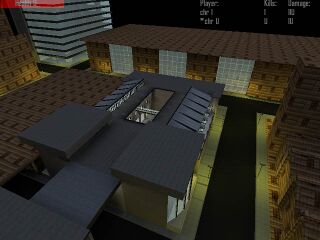
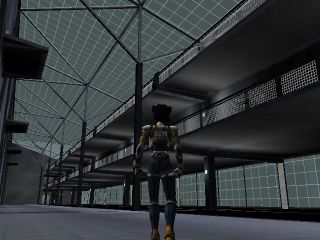
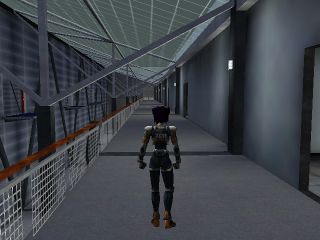
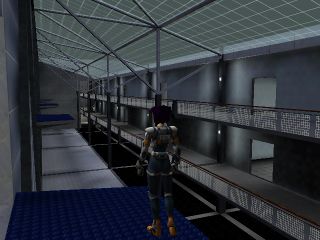
Significantly, internal design documents also labeled this level as "SYNDICATE HQ", and Alex Okita labeled these images as "Syndicate headquarters" in an art gallery prepared for AIC. This shows that Bungie West was equating the two organizations ("joined at the hip", as Chung wrote; BGI "a front company", per this forum post from Hardy). With no concrete level ever being placed in slots 15 or 17, and the original ending level being 18 before Mountain Compound was renumbered from level 7 to 19 to place it at the end of the game, this means that level 16, BGI/Syndicate HQ, was the penultimate level of the game, and Oni was going to conclude with level 18, TCTF HQ Redux.
However, as Hardy explained above, BGI was cannibalized for parts which were used in other levels. Additionally, the salvaged script for this level reveals only two disconnected cutscenes, implying that the level was not substantially complete.
The Arena of Pain
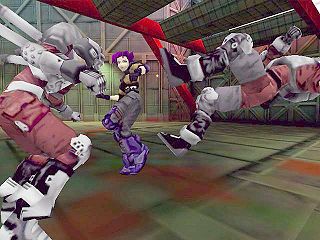
This was an arena with an industrial center area and much cleaner/brighter outlying areas connected by walkways, seen at various stages of development or in various flavors. This level also featured heavily in mid-development video footage (see § Video footage).
|
|
|
|
|

|
|
|
|
|
|

|
|
| In the first three shots, the wall seen on the left appears to say "[DA]VES [AR]ENA of PAiN", which if true would refer to Dave Dunn the level modeler. | ||
|
|
| The arena Steve Abeyta played in when he demoed multiplayer in 2000 (see Multiplayer for a video of this demonstration). These shots do not depict the same side of the same room; probably opposite sides of that room. The ramp briefly flattens out before continuing to ascend halfway through the room, which in these screenshots can be easily mistaken for some kind of distortion or modeling error. | |
Crossing Zone?
|
|
|
| Alex Okita remembered this as "Just a bunch of tubes"; "It was pretty big, lots of falling and dying, from what I remember". The cross-beams are also reminiscent of Construction Pit. | ||
Construction Pit (The Pit)
A giant playground where most of the 1999 trailer gameplay was recorded.
|
|
|
|
|
|
|
|
|
| The first three pictures show some basic elements of the level's architecture (most notably, very steep stairs). The third picture shows Konoko knocking down an early Tanker, with what looks like a collision glitch. The fourth picture is a rare glimpse at the Iron Demon. | ||
|
|
|
|
|
|
|
|
|
|
|
|
|
|
|
|
|
|
|
|
|
| ||
AlexTestSite
We don't have any images that we can link to this level. The script for the level, found in the ats folder in some versions of Oni's IGMD, shows that this was a test level for Mukade's teleportation (with a comment referencing the "bamf" sound effect of comic book fame).
Miscellaneous mysteries
|
|
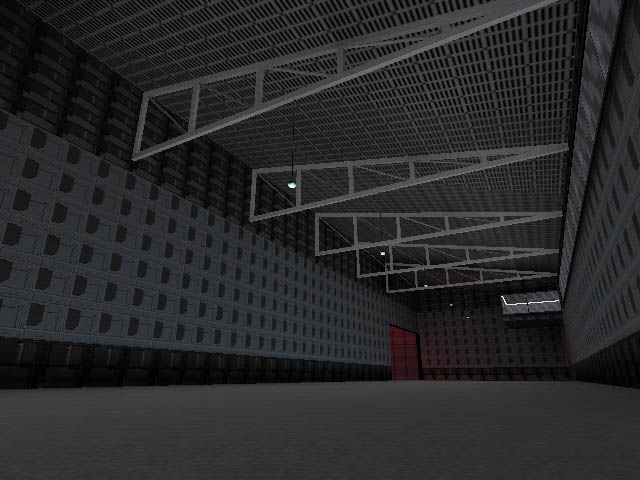
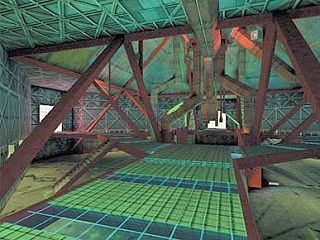
| This looks like the Syndicate Warehouse or Atmospheric Conversion Center (interior), but doesn't match with the current versions of either. | |
Cut weapons
Shibume auto-pistol
| |
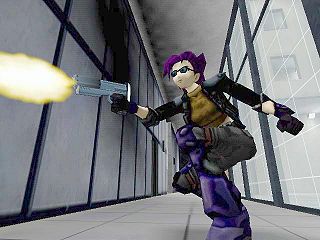
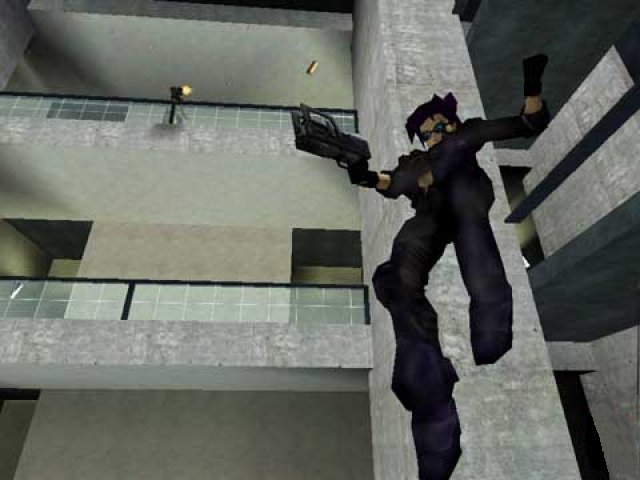
| This now-extinct pistol was seen all over the place back when Bungie was taking pre-beta screenshots. This was the Shibume SH-40, a fully-automatic pistol that fired 10 rounds/sec. |
Belt-fed SMG
|
|
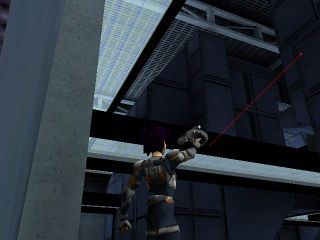
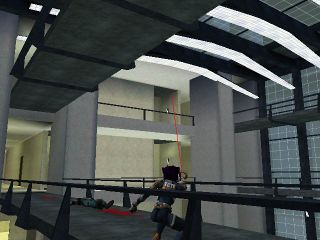
| An unnamed machine gun with a visible clip of ammunition. Note the laser sight emanating from an odd place on the weapon. Unique aiming reticles for the weapons were added in the final month of development according to Hardy, but they were experimenting much earlier with the use of a laser sight to help the player see where they were aiming. The laser-plus-dot system can be seen in use with the Shibume SH-40 HERE, and a dot-only system can be seen in use HERE. | |
Multi-rocket launcher
|
|
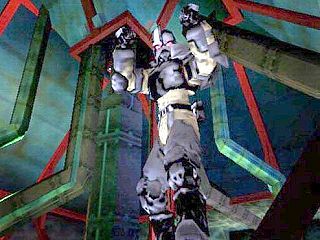
| |
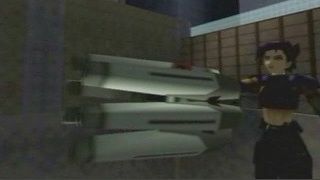
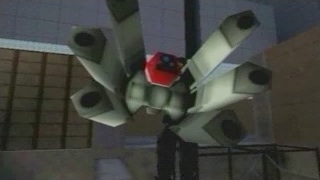
| The Iron Demon can be seen firing this weapon in the trailer at 1:25; apparently Konoko would salvage the gun from the ID after destroying it. Although fans were impressed by its size, some also wanted to know how petite Konoko could even hold the thing. Okita joked that it was filled with anti-gravity. This was probably the basis for the (much smaller) Scram Cannon. | |
Energy pistol
|

|
| |
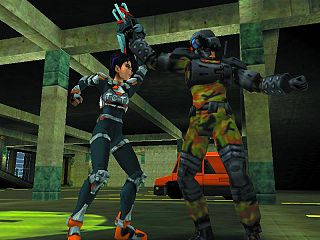
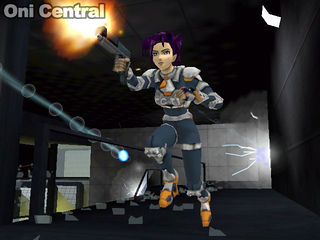
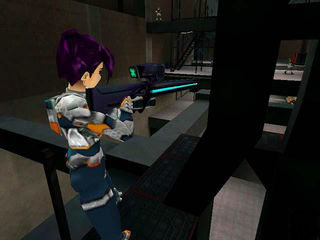
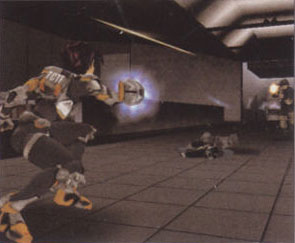
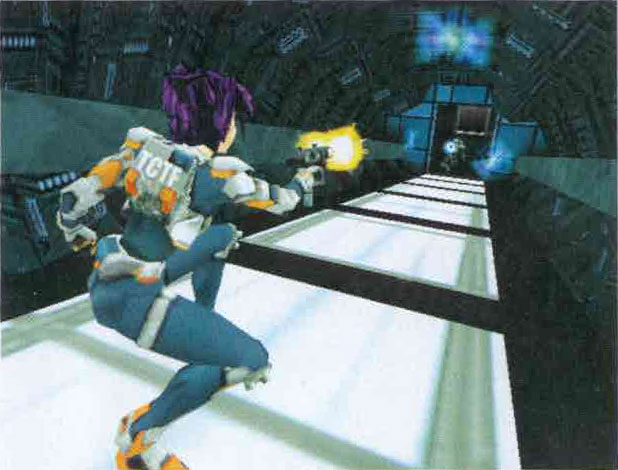
| This was some sort of energy weapon, firing small shots resembling lens flares which rotated as they flew. Note that the enemy is firing this gun in the last shot; Konoko merely wields an SMG. | |
Iron Demon
See Iron Demon to learn about the mech that Konoko was supposed to fight, which did not make it into the final game.
Altered characters
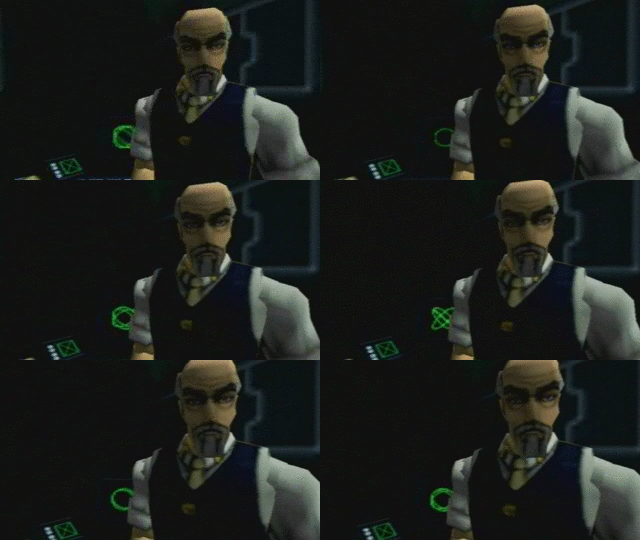
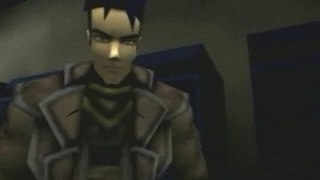
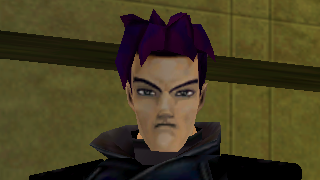
Some characters are considered to have declined in appearance since the 1999 trailer that was cut during Oni's development, particularly Muro:
| 1999 | 2001 |
|---|---|
|
|
Besides the wardrobe change, his facial structure has been altered to make him, well, coyote ugly. When asked about Muro's redesign shortly after Oni's release, Hardy stated:
There were some issues with a few of the original characters, specifically the way they were modelled and textured. When Chris Hug[h]es got around to redoing them to remove sorting issues and correct their "physiques" (which is an 3D animation term relating to the way the vertices interact during animation) he often changed their clothes from the outfits Alex Okita originally gave 'em. Chris and Alex had what you might call a "friendly rivalry" in the art department ;^>
Cut animated textures
The 1999 trailer also reveals that computer screens were going to be animated. The engine still allows animated textures but, besides special effects such as fire, Oni only seems to use this feature once in the environment – for the 15-frame news broadcast on the giant screen in Rooftops. Animated textures would have brought more life to the environment, but at the cost of added memory, especially for the smooth computer screen animations seen in the trailer, which appear to be 30 frames long. Here are all three of them, though the third appears to be a fuller view of the second:
