Pre-beta content: Difference between revisions
(→Regional State Building: correcting order and description of show floor trailer stills) |
(if you put the commentary into the tables, then you get auto-wrapping and don't need to use manual <br>s) |
||
| Line 8: | Line 8: | ||
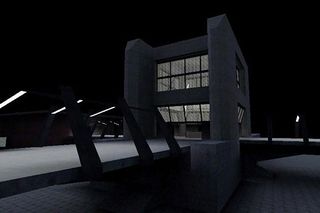
===Syndicate Warehouse=== | ===Syndicate Warehouse=== | ||
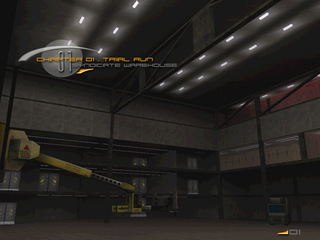
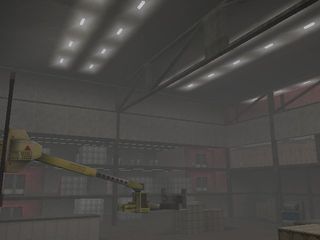
There are 15 hidden doors there. When revealed, they turn this very linear level into a completely non-linear structure (more like a real warehouse). | There are 15 hidden doors there. When revealed, they turn this very linear level into a completely non-linear structure (more like a real warehouse). | ||
{| | {| style="width:650px" | ||
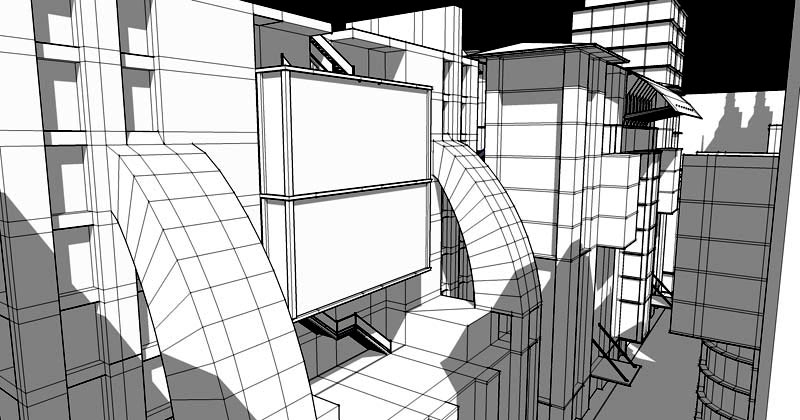
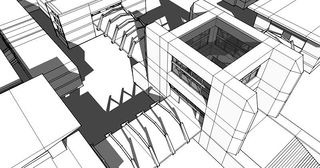
|+4 extra doors can be seen | |+4 extra doors can be seen in the left picture; on the right, the current appearance of the level from this angle | ||
|[[Image:CHAPTER_01_._TRIAL_RUN.png|320px]] | |[[Image:CHAPTER_01_._TRIAL_RUN.png|320px]] | ||
|[[Image:Warehouse from splashscreen angle.jpg|320px]] | |[[Image:Warehouse from splashscreen angle.jpg|320px]] | ||
|- | |||
| colspan="2" | The level changed after Bungie West took a screenshot as a basis for their chapter's title screen. Many crates were added, the doors re-textured... and the forklift is higher now. | |||
|} | |} | ||
---- | ---- | ||
===Musashi Manufacturing Plant=== | ===Musashi Manufacturing Plant=== | ||
This one has evolved quite a lot. | This one has evolved quite a lot. | ||
{| | {| style="width:650px" | ||
|+'''The room with the "engines of evil"''' | |+'''The room with the "engines of evil"''' | ||
|[[Image:ManPlant11.JPG|320px]] | |[[Image:ManPlant11.JPG|320px]] | ||
| Line 28: | Line 28: | ||
|[[Image:ManPlant10.JPG|320px]] | |[[Image:ManPlant10.JPG|320px]] | ||
|[[Image:ManPlant13.jpg|320px]] | |[[Image:ManPlant13.jpg|320px]] | ||
|- | |||
| colspan="2" | There was more conventional warehouse machinery in here back then. | |||
|} | |} | ||
{| style="width:650px" | |||
{| | |||
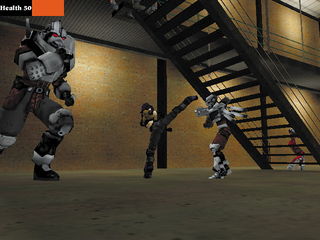
|+'''The foyer''' | |+'''The foyer''' | ||
| colspan="2" align="center" | [[Image:Genesis Level2 10.jpg|320px]] | | colspan="2" align="center" | [[Image:Genesis Level2 10.jpg|320px]] | ||
| Line 48: | Line 48: | ||
|[[Image:Genesis Level2 5.jpg|320px]] | |[[Image:Genesis Level2 5.jpg|320px]] | ||
|[[Image:Genesis Level2 6.jpg|320px]] | |[[Image:Genesis Level2 6.jpg|320px]] | ||
|- | |||
| colspan="2" | Note the door leading off the center of the foyer: there was a corridor running through the middle of the building. | |||
|} | |} | ||
{| style="width:650px" | |||
{| | |+'''An unknown area'''<br>(with lightmapping, discussed in the "Pre-beta features" article) | ||
|+'''An unknown area''' | |||
|[[Image:ManPlant3.JPG|320px]] | |[[Image:ManPlant3.JPG|320px]] | ||
|[[Image:Genesis Level2 9.jpg|320px]] | |[[Image:Genesis Level2 9.jpg|320px]] | ||
| Line 62: | Line 62: | ||
|- | |- | ||
| colspan="2" align="center" | [[Image:ManPlant14.jpg|320px]] | | colspan="2" align="center" | [[Image:ManPlant14.jpg|320px]] | ||
|- | |||
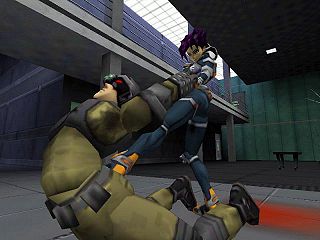
| colspan="2" | The last picture has a very provisional-looking health bar; these are some early screenshots. | |||
|} | |} | ||
{| style="width:650px" | |||
{| | |||
|+'''Inner flyway and back of the building''' | |+'''Inner flyway and back of the building''' | ||
| colspan="2" align="center" | [[Image:Genesis Level2 11.jpg|320px]] | | colspan="2" align="center" | [[Image:Genesis Level2 11.jpg|320px]] | ||
| Line 79: | Line 79: | ||
|[[Image:ManPlant8.JPG|320px]] | |[[Image:ManPlant8.JPG|320px]] | ||
|[[Image:ManPlant9.JPG|320px]] | |[[Image:ManPlant9.JPG|320px]] | ||
|- | |||
| colspan="2" | The stairs lead up to the offices. | |||
|} | |} | ||
{| style="width:650px" | |||
{| | |||
|+'''The offices''' | |+'''The offices''' | ||
|[[Image:Genesis Level2 13.jpg|320px]] | |[[Image:Genesis Level2 13.jpg|320px]] | ||
| Line 94: | Line 94: | ||
| align="center" | [[Image:Pre-beta Office 1.jpg]] | | align="center" | [[Image:Pre-beta Office 1.jpg]] | ||
|[[Image:Pre-beta Office 2.jpg]] | |[[Image:Pre-beta Office 2.jpg]] | ||
|- | |||
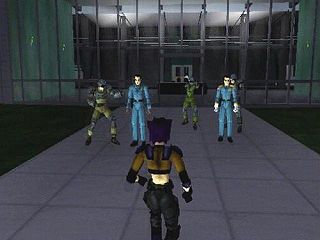
| colspan="2" | The offices seem to be in the back of the building, on both floors, with doors and "windows" onto the "alarm console gallery". First 4 pics: lower floor, the empty dark wall on the first is where the stairs are. Last 2 pics: upper floor. | |||
|} | |} | ||
---- | ---- | ||
===Vago Bio-Research Lab=== | ===Vago Bio-Research Lab=== | ||
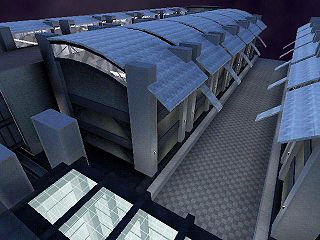
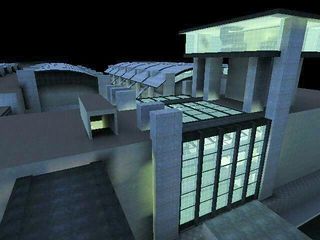
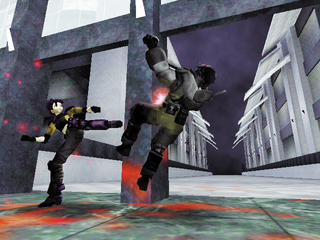
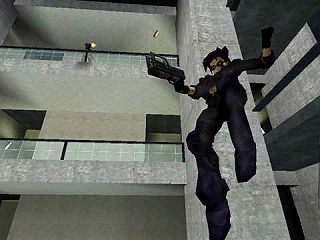
This one has kept the same basic layout, but there were a few changes. The most distinct difference is the night-time setting. | This one has kept the same basic layout, but there were a few changes. The most distinct difference is the night-time setting. | ||
{| | {| style="width:650px" | ||
|+'''Lab at night-time''' | |+'''Lab at night-time''' | ||
|[[Image:Genesis Level3 6.jpg|320px]] | |[[Image:Genesis Level3 6.jpg|320px]] | ||
| Line 113: | Line 111: | ||
|[[Image:Genesis Level3 11.jpg|320px]] | |[[Image:Genesis Level3 11.jpg|320px]] | ||
|- | |- | ||
|[[Image:Pre-beta Vago Lab.png|320px]] | |||
|[[Image:Vago11.JPG|320px]] | |||
|- | |||
| colspan="2" | The interior is only done in one half of the lab. There are also pillars and foyer doors missing, and extra ledges along the sides of the area where you fight Barabas. | |||
|} | |} | ||
{| style="width:650px" | |||
{| | |||
|+'''Foyer and SLD wing''' | |+'''Foyer and SLD wing''' | ||
|[[Image:Genesis Level3 8.jpg|320px]] | |[[Image:Genesis Level3 8.jpg|320px]] | ||
| Line 137: | Line 134: | ||
|[[Image:Genesis Level3 9.jpg|320px]] | |[[Image:Genesis Level3 9.jpg|320px]] | ||
|[[Image:Genesis Level3 10.jpg|320px]] | |[[Image:Genesis Level3 10.jpg|320px]] | ||
|- | |||
| colspan="2" | There were stools for the scientists... apart from that, this wing is pretty much final. | |||
|} | |} | ||
{| style="width:650px" | |||
{| | |||
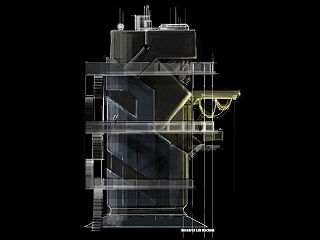
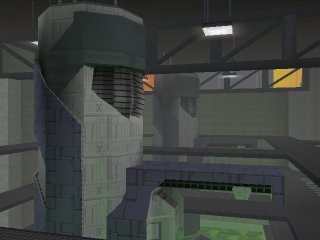
|+'''Machines in the acid room''' | |+'''Machines in the acid room''' | ||
|[[Image:Genesis Level3 13.jpg|320px]] | |[[Image:Genesis Level3 13.jpg|320px]] | ||
|[[Image:Vago_Lab_acid_machine.jpg]] | |[[Image:Vago_Lab_acid_machine.jpg]] | ||
|- | |||
| colspan="2" | The final ones are much thinner, and the layout of the stairs and catwalks is different. | |||
|} | |} | ||
---- | ---- | ||
===Vansam Regional Airport=== | ===Vansam Regional Airport=== | ||
{| | {| style="width:650px" | ||
|+The airport's entrance | |+The airport's entrance | ||
|[[Image:Pre-beta_Airport.jpg]] | |[[Image:Pre-beta_Airport.jpg]] | ||
|- | |||
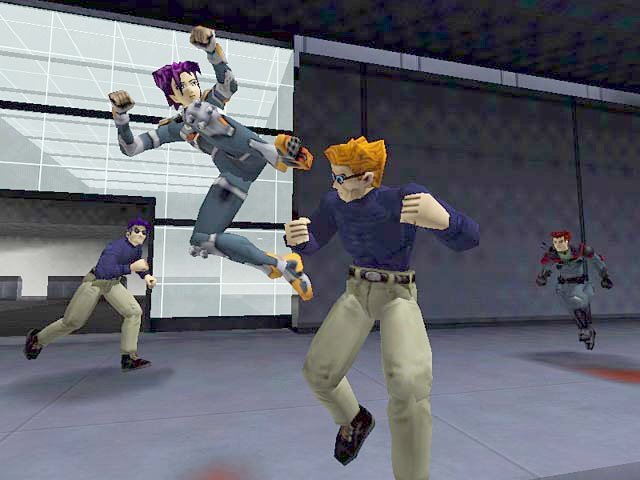
|This could be the "Arrivals" section (which is now completely empty). | |||
|} | |} | ||
---- | ---- | ||
===TCTF Regional Headquarters=== | ===TCTF Regional Headquarters=== | ||
{| | {| style="width:650px" | ||
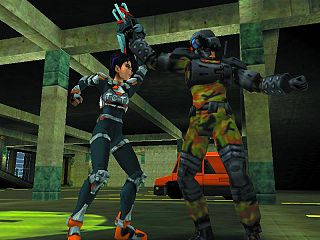
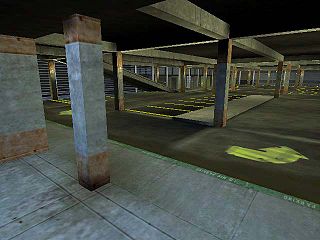
|+'''Parking lot''' | |+'''Parking lot''' | ||
|[[Image:Genesis Level8 2.jpg|320px]] | |[[Image:Genesis Level8 2.jpg|320px]] | ||
| Line 171: | Line 167: | ||
|[[Image:Genesis Level8 1.jpg|320px]] | |[[Image:Genesis Level8 1.jpg|320px]] | ||
|[[Image:TCTF8.JPG|320px]] | |[[Image:TCTF8.JPG|320px]] | ||
|- | |||
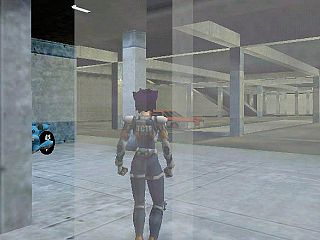
| colspan="2" | A longer car. Different transition from the parking lot to the main building. Konoko's bike is parked nicely in that first shot, instead of laying on the floor. | |||
|} | |} | ||
{| style="width:650px" | |||
{| | |||
|+'''Main entrance''' | |+'''Main entrance''' | ||
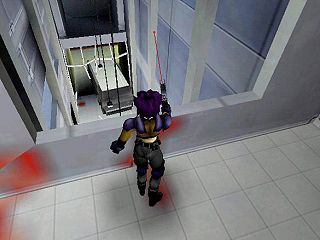
|[[Image:Genesis Level8 5.jpg|320px]] | |[[Image:Genesis Level8 5.jpg|320px]] | ||
| Line 184: | Line 179: | ||
|[[Image:TCTF7.JPG|320px]] | |[[Image:TCTF7.JPG|320px]] | ||
|[[Image:TCTF12.JPG|320px]] | |[[Image:TCTF12.JPG|320px]] | ||
|- | |||
| colspan="2" | The room is more than 2 times wider now. There are windows on the right and catwalks running across the far side. The entrance door changed a lot, but the van didn't change much... | |||
|} | |} | ||
{| | {| style="width:650px" | ||
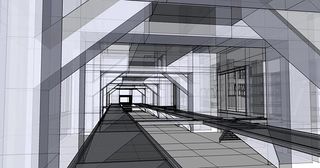
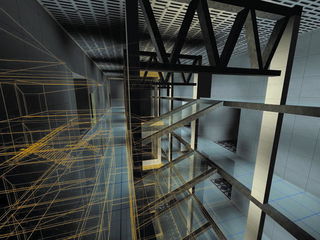
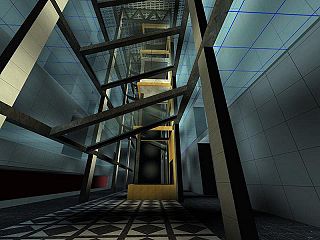
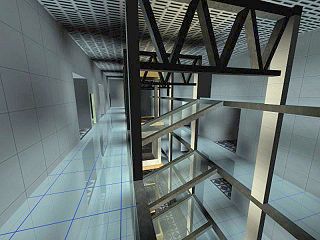
|+'''The "atrium" rendered in an editor''' | |+'''The "atrium" rendered in an editor''' | ||
|[[Image:TCTF0.jpg|320px]] | |[[Image:TCTF0.jpg|320px]] | ||
| Line 195: | Line 190: | ||
|- | |- | ||
| colspan="2" align="center" | [[Image:Pre-beta TCTF HQ.jpg|320px]] | | colspan="2" align="center" | [[Image:Pre-beta TCTF HQ.jpg|320px]] | ||
|- | |||
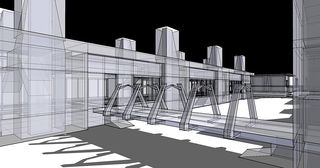
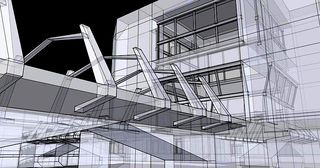
| colspan="2" | The elevator was ''between'' the two sets of ramps. Solid floors had a tiling pattern, and ramps were transparent. | |||
|} | |} | ||
{| style="width:650px" | |||
{| | |||
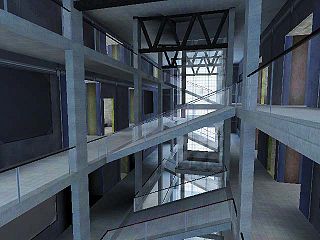
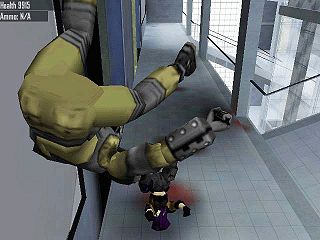
|+'''The atrium''', another version | |+'''The atrium''', another version | ||
|[[Image:Genesis Level8 9.jpg|320px]] | |[[Image:Genesis Level8 9.jpg|320px]] | ||
| Line 210: | Line 205: | ||
|[[Image:TCTF15.JPG|320px]] | |[[Image:TCTF15.JPG|320px]] | ||
|[[Image:TCTF17.JPG|320px]] | |[[Image:TCTF17.JPG|320px]] | ||
|- | |||
| colspan="2" | The ramps had really nice railings (I wish they'd kept them), overall the room was much lighter (there's a light wall on the far side). Same "V" structures at the ceiling as above: they're gone now. The layout of the rooms on either side is different, too. | |||
|} | |} | ||
{| style="width:650px" | |||
{| | |||
|+'''Damocles''' | |+'''Damocles''' | ||
|[[Image:Genesis Level8 10.jpg|320px]] | |[[Image:Genesis Level8 10.jpg|320px]] | ||
| Line 222: | Line 216: | ||
|- | |- | ||
| colspan="2" align="center" | [[Image:Genesis Level8 11.jpg|320px]] | | colspan="2" align="center" | [[Image:Genesis Level8 11.jpg|320px]] | ||
|- | |||
| colspan="2" | The model didn't change at all, but now it's placed at the center (floor 2/3) of a really tall, open room. As for the terminals, there are primitives with similar looks, around Damocles and elsewhere. Note the [[wikipedia:Marathon_(video_game)|Marathon]] logo on Damocles's hull (an [[Easter eggs|Easter egg]]). | |||
|} | |} | ||
{| style="width:650px" | |||
{| | |||
|+'''Outdoors''' | |+'''Outdoors''' | ||
|[[Image:TCTF1.JPG|320px]] | |[[Image:TCTF1.JPG|320px]] | ||
| Line 236: | Line 228: | ||
|[[Image:TCTF4.JPG|320px]] | |[[Image:TCTF4.JPG|320px]] | ||
|[[Image:TCTF9.JPG|320px]] | |[[Image:TCTF9.JPG|320px]] | ||
|- | |||
| colspan="2" | The parking lot was more lushly lit on the outside. Now there's no light on the sidewalks. There used to be a lot more cars in the garage, too. | |||
|} | |} | ||
{| style="width:650px" | |||
{| | |||
|+'''Misc.''' | |+'''Misc.''' | ||
|[[Image:TCTF5.JPG|320px]] | |[[Image:TCTF5.JPG|320px]] | ||
| Line 249: | Line 240: | ||
| colspan="2" align="center" | [[Image:TCTF20.JPG|320px]] | | colspan="2" align="center" | [[Image:TCTF20.JPG|320px]] | ||
|} | |} | ||
---- | ---- | ||
===Atmospheric Conversion Center=== | ===Atmospheric Conversion Center=== | ||
{| | {| style="width:650px" | ||
|[[Image:Turbitt - ACC 1.jpg|320px]] | |[[Image:Turbitt - ACC 1.jpg|320px]] | ||
|[[Image:Turbitt - ACC 2.jpg|320px]] | |[[Image:Turbitt - ACC 2.jpg|320px]] | ||
| Line 262: | Line 253: | ||
|[[Image:Turbitt - ACC 5.jpg|320px]] | |[[Image:Turbitt - ACC 5.jpg|320px]] | ||
|[[Image:Turbitt - ACC 6.jpg|320px]] | |[[Image:Turbitt - ACC 6.jpg|320px]] | ||
|- | |||
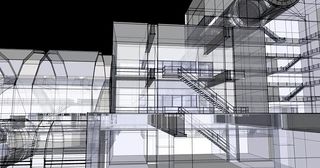
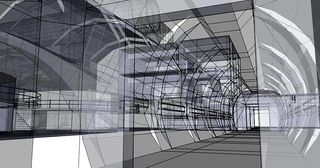
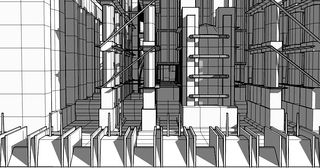
| colspan="2" | These shots are probably from the time when [[Oni/Early Story|this was an electric plant]]. Note that the giant tube that serves as the end of the level (seen in the first pic) has a floor to walk on, in place of the electrified beam suspended in the middle, which Konoko runs down while being pursued by the TCTF. The pipe is also connected directly to the building, rather than being at the top of an elevator shaft. In the current version of the level, the mid-air beam is also the shaft for the giant fan; adding the fan was probably a hasty improvisation to make the level seem more like an ACC and less like an electric plant... but the fan shaft is still electrified! | |||
|} | |} | ||
---- | ---- | ||
===Regional State Building=== | ===Regional State Building=== | ||
Hardy [http://carnage.bungie.org/oniforum/oni.forum.pl?read=19078 once stated] that RSB was the first building that Bungie completed. Apparently that is also why it's been through so many changes. | Hardy [http://carnage.bungie.org/oniforum/oni.forum.pl?read=19078 once stated] that RSB was the first building that Bungie completed. Apparently that is also why it's been through so many changes. | ||
{| | {| style="width:650px" | ||
|+'''The foyer and lobby''' | |+'''The foyer and lobby''' | ||
|[[Image:Pre-beta_RSB_1.jpg|320px]] | |[[Image:Pre-beta_RSB_1.jpg|320px]] | ||
| Line 296: | Line 283: | ||
|[[Image:Pre-beta enigma 4c.jpg|320px]] | |[[Image:Pre-beta enigma 4c.jpg|320px]] | ||
|- | |- | ||
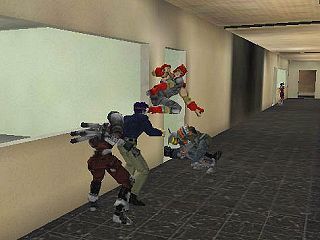
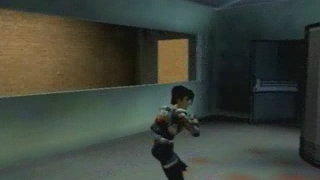
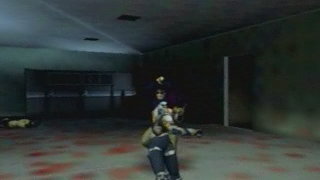
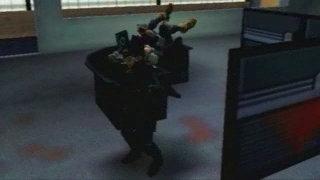
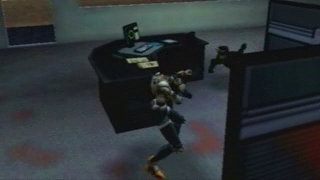
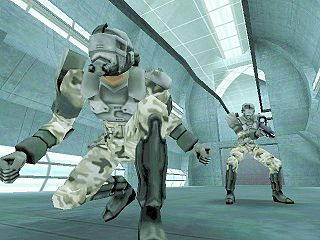
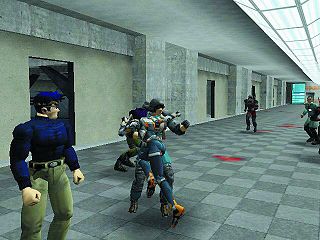
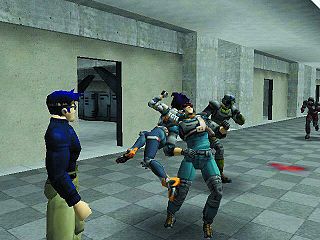
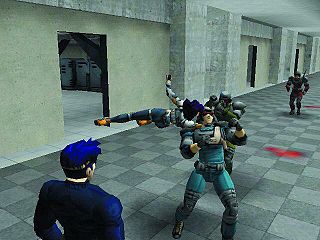
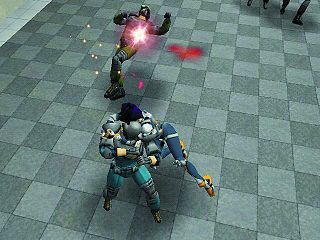
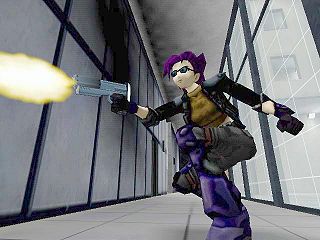
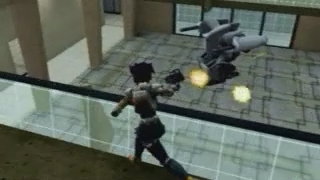
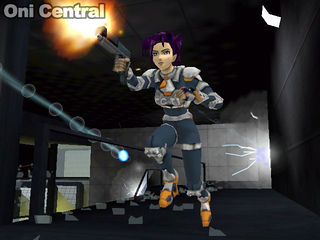
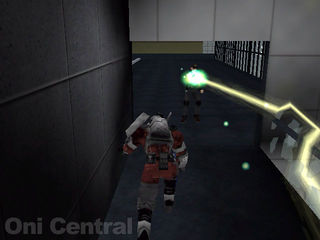
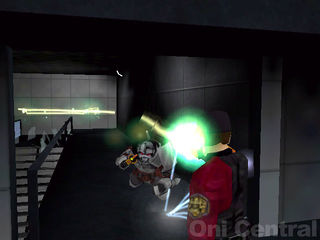
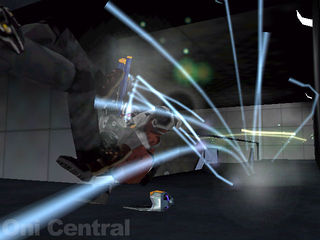
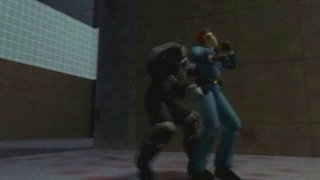
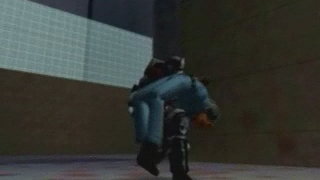
|colspan="2"|These screenshots are taken from [http://iritscen.oni2.net/movies/Harry%20at%20MW%20NY%202000.mov this show floor trailer]. The last three images show a sequence that uses multiple camera angles, in which a cop is knocked down by what appears to be the Tanker rolling attack, but with energy shooting from its starting point. | | colspan="2" | These screenshots are taken from [http://iritscen.oni2.net/movies/Harry%20at%20MW%20NY%202000.mov this show floor trailer]. The last three images show a sequence that uses multiple camera angles, in which a cop is knocked down by what appears to be the Tanker rolling attack, but with energy shooting from its starting point. | ||
|} | |} | ||
{| style="width:650px" | |||
{| | |||
|+'''Outside''' | |+'''Outside''' | ||
| align="center" | [[Image:Konoko_runs_from_Iron_Demon.jpg]] | | align="center" | [[Image:Konoko_runs_from_Iron_Demon.jpg]] | ||
| Line 311: | Line 297: | ||
|[[Image:RegionalState7.JPG|320px]] | |[[Image:RegionalState7.JPG|320px]] | ||
|[[Image:RegionalState8.JPG|320px]] | |[[Image:RegionalState8.JPG|320px]] | ||
|- | |||
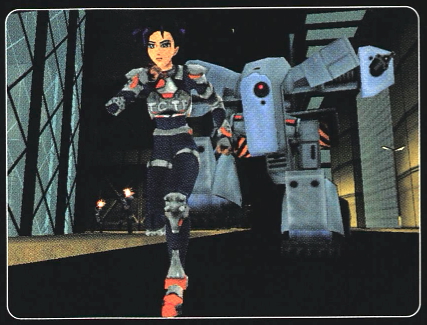
| colspan="2" | By the time Bungie took the outside shot with the Iron Demon, they'd barred in the foyer. Also, notice the missing wall of glass in the last set of pics. This section is now occupied by a wall with a normal-sized door set in the middle of it. The original wide-open entrance is an odd design choice. Could it have been a pet door for the Iron Demon? Most likely the ID was only shown in this level because it was their "test-bed" level, since it was really meant for BGI HQ, but perhaps an initial skirmish was once planned here. Finally, note the multiplayer HUD in the top-right of many of these pictures; the screenshot-taker was in MP mode at the time. | |||
|} | |} | ||
---- | ---- | ||
===Rooftops=== | ===Rooftops=== | ||
{| | {| style="width:650px" | ||
|[[Image:Turbitt - Rooftops 1.jpg]] | |[[Image:Turbitt - Rooftops 1.jpg]] | ||
|- | |||
|If this is the area that leads up to the roof where Konoko fights Mukade, it looks like the original plan called for a staircase, not an elevator. The overall flow of the level must have been different too, as the blocks that Konoko jumps up are missing from the area to the right of the floor that the staircase starts on. The buildings with the rounded and steepled roofs in the background are now in a different position with respect to the Mukade building. Perhaps a block of buildings was rotated for the final model. | |||
|} | |} | ||
---- | ---- | ||
===TCTF Science Prison=== | ===TCTF Science Prison=== | ||
{| | {| style="width:650px" | ||
|+'''The scanner''' | |+'''The scanner''' | ||
|[[Image:Pre-beta_Science_Prison_scanner.jpg]] | |[[Image:Pre-beta_Science_Prison_scanner.jpg]] | ||
|- | |||
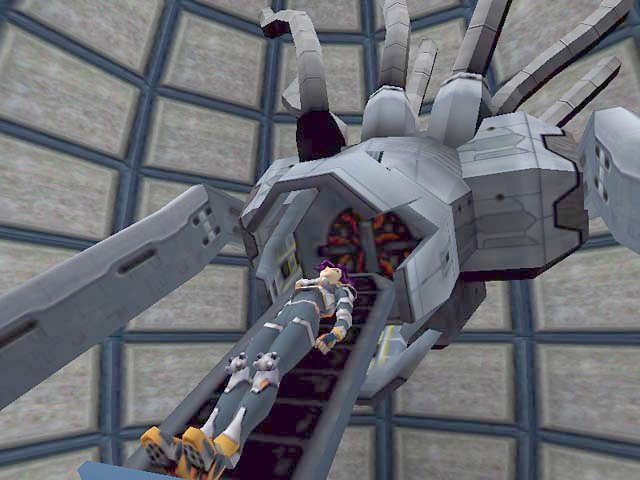
|New wall textures. Looks like the scanner's textures are actually higher-res than what we have now. | |||
|} | |} | ||
{| | |||
{| style="width:650px" | |||
|+'''Security tower''' | |+'''Security tower''' | ||
|[[Image:Turbitt_-_Science_Prison_1.jpg|320px]] | |[[Image:Turbitt_-_Science_Prison_1.jpg|320px]] | ||
| Line 350: | Line 330: | ||
|- | |- | ||
| colspan="2" align="center" | [[Image:Turbitt - Science_Prison_5.jpg|320px]] | | colspan="2" align="center" | [[Image:Turbitt - Science_Prison_5.jpg|320px]] | ||
|- | |||
| colspan="2" | There used to be some very interesting lit walkways leading in and out of the security tower. They were replaced on all three sides by corridors with laser obstacles. The last picture shows an interesting area that was apparently removed, which is roughly in the same position as the acid vat complex in the final model. | |||
|} | |} | ||
---- | ---- | ||
===Syndicate Mountain Compound=== | ===Syndicate Mountain Compound=== | ||
{| style="width:650px" | |||
{| | |||
|+'''Heart of the Sturmanderung Megacomputer''' | |+'''Heart of the Sturmanderung Megacomputer''' | ||
!Pre-beta | |||
!Now | |||
|- | |||
|[[Image:Pre-beta_Compound_1.jpg|320px]] | |[[Image:Pre-beta_Compound_1.jpg|320px]] | ||
|[[Image:Compound_1.jpg|320px]] | |[[Image:Compound_1.jpg|320px]] | ||
| Line 375: | Line 356: | ||
|[[Image:Compound3.JPG|320px]] | |[[Image:Compound3.JPG|320px]] | ||
|[[Image:Compound4.JPG|320px]] | |[[Image:Compound4.JPG|320px]] | ||
|- | |||
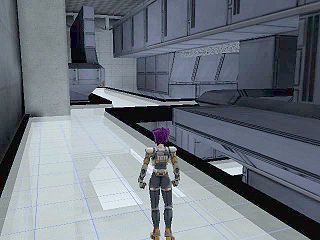
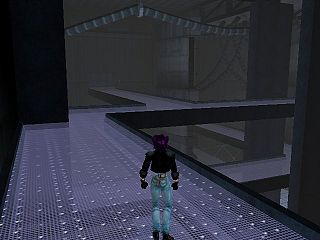
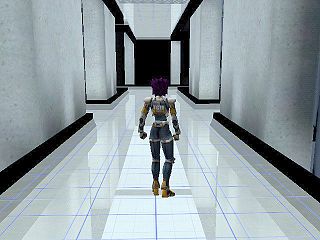
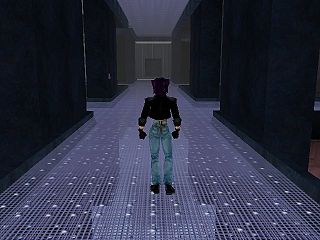
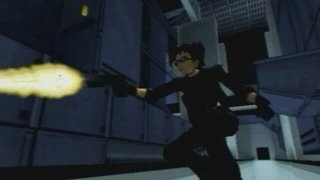
| colspan="2" | The basic layout of the room is the same, but it was much more crowded with "computers" and the existing catwalks were aligned differently. | |||
|} | |} | ||
{| style="width:650px" | |||
{| | |||
|+'''Somewhere else''' | |+'''Somewhere else''' | ||
|[[Image:Compound5.JPG|320px]] | |[[Image:Compound5.JPG|320px]] | ||
| Line 390: | Line 370: | ||
|- | |- | ||
| colspan="2" align="center" | [[Image:Compound15.JPG|320px]] | | colspan="2" align="center" | [[Image:Compound15.JPG|320px]] | ||
|- | |||
| colspan="2" | Apparently the Syndicate is also in league with BLAM Transport Inc.! Another BGI front? | |||
|} | |} | ||
---- | ---- | ||
==Cut levels== | ==Cut levels== | ||
===Names of these levels=== | ===Names of these levels=== | ||
| Line 475: | Line 456: | ||
|} | |} | ||
---- | |||
===Airport Part Deux=== | ===Airport Part Deux=== | ||
The presence of the '''Airport_II''' IGMD folder in [[Big Blue Box|BBB]] Oni explains why retail Oni contains an '''Airport''' and '''Airport_III''' folder but no "Airport_II". The scripts in this folder are very short and little of the level can be gleaned from them. However, a mention of the animation "KONOKOlev5_outro_run" allows us to pin down '''Airport_II''' as the missing level 5 in the sequence of levelx_Final folders in GameDataFolder. This is consistent with '''Airport''' being linked to level4_Final and '''Airport_III''' being linked to level6_Final. [http://carnage.bungie.org/oniforum/oni.forum.pl?read=14227 This post] by Chris Butcher indicates that there was an underground portion to the Airport which was removed. | The presence of the '''Airport_II''' IGMD folder in [[Big Blue Box|BBB]] Oni explains why retail Oni contains an '''Airport''' and '''Airport_III''' folder but no "Airport_II". The scripts in this folder are very short and little of the level can be gleaned from them. However, a mention of the animation "KONOKOlev5_outro_run" allows us to pin down '''Airport_II''' as the missing level 5 in the sequence of levelx_Final folders in GameDataFolder. This is consistent with '''Airport''' being linked to level4_Final and '''Airport_III''' being linked to level6_Final. [http://carnage.bungie.org/oniforum/oni.forum.pl?read=14227 This post] by Chris Butcher indicates that there was an underground portion to the Airport which was removed. | ||
---- | |||
===Obsolete, etc.=== | ===Obsolete, etc.=== | ||
This level, which would have been level7_Final, represents the gap between the end of the airport levels and the first TCTF HQ level. Since Bungie blanked the name of this level, we can only speculate on this level and the unnamed levels 15 and 17 (for 16, see below). However, Chris Butcher's comment above and Hardy's comment [http://carnage.bungie.org/oniforum/oni.forum.pl?read=19648 here] indicate that levels were originally planned according to an earlier version of the story, hence the gaps in numbering are mostly indicative of a change in plans, rather than of content actually being created and then cut. | This level, which would have been level7_Final, represents the gap between the end of the airport levels and the first TCTF HQ level. Since Bungie blanked the name of this level, we can only speculate on this level and the unnamed levels 15 and 17 (for 16, see below). However, Chris Butcher's comment above and Hardy's comment [http://carnage.bungie.org/oniforum/oni.forum.pl?read=19648 here] indicate that levels were originally planned according to an earlier version of the story, hence the gaps in numbering are mostly indicative of a change in plans, rather than of content actually being created and then cut. | ||
---- | |||
===BGI HQ=== | ===BGI HQ=== | ||
This level was likely intended as Konoko's final confrontation with the shadowy [[BGI]], which was later excised from the story as Oni's development ran out of time. Fragments of a script for this level can be found in [[Big Blue Box|BBB]] Oni. The scripts contain two cutscenes, one of which describes Konoko setting a bomb and taking cover, and the resulting explosion, and the other cutscene introduces the [[Iron Demon]] that would end up getting cut from the game. The number of the level indicates that these events would take place before Konoko returns to the TCTF to confront Griffin and after meeting with Kerr in the Science Prison. | This level was likely intended as Konoko's final confrontation with the shadowy [[BGI]], which was later excised from the story as Oni's development ran out of time. Fragments of a script for this level can be found in [[Big Blue Box|BBB]] Oni. The scripts contain two cutscenes, one of which describes Konoko setting a bomb and taking cover, and the resulting explosion, and the other cutscene introduces the [[Iron Demon]] that would end up getting cut from the game. The number of the level indicates that these events would take place before Konoko returns to the TCTF to confront Griffin and after meeting with Kerr in the Science Prison. | ||
| Line 493: | Line 480: | ||
|} | |} | ||
---- | |||
===Arena of Pain?=== | ===Arena of Pain?=== | ||
A very simple arena level, at various stages of development, or in various flavors. Possibly "The Arena of Pain". | A very simple arena level, at various stages of development, or in various flavors. Possibly "The Arena of Pain". | ||
| Line 511: | Line 500: | ||
|} | |} | ||
---- | |||
===Crossing Zone?=== | ===Crossing Zone?=== | ||
{| | {| style="width:650px" | ||
|[[Image:Pre-beta Muro vs. Konoko.jpg|320px]] | |[[Image:Pre-beta Muro vs. Konoko.jpg|320px]] | ||
|[[Image:Pre-beta Muro vs. Konoko 2.jpg|320px]] | |[[Image:Pre-beta Muro vs. Konoko 2.jpg|320px]] | ||
|- | |||
| colspan="2" | Alex Okita remembered this as "Just a bunch of tubes"; "It was pretty big, lots of falling and dying, from what I remember". The cross-beams are also reminiscent of Construction Pit. | |||
|} | |} | ||
---- | |||
===Construction Pit (The Pit)=== | ===Construction Pit (The Pit)=== | ||
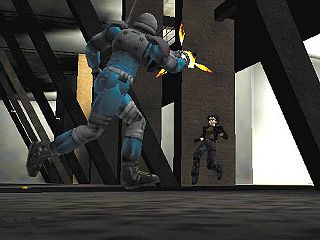
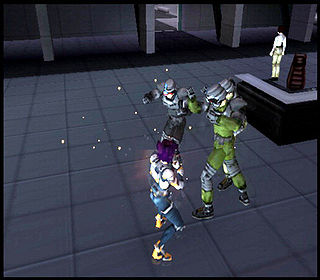
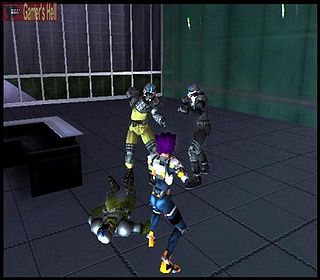
A giant playground where most of the 1999 trailer gameplay was recorded. | A giant playground where most of the 1999 trailer gameplay was recorded. | ||
| Line 531: | Line 524: | ||
{| style="width:650px" | |||
{| | |||
|+'''Down below''' | |+'''Down below''' | ||
|[[Image:MP arena 2-1.jpg|320px]] | |[[Image:MP arena 2-1.jpg|320px]] | ||
|[[Image:MP arena 2-2.jpg|320px]] | |[[Image:MP arena 2-2.jpg|320px]] | ||
|- | |- | ||
|[[Image:MP arena 2-3.jpg|320px]] | |||
|[[Image:MP arena 2-4 with Iron Demon.jpg|320px]] | |[[Image:MP arena 2-4 with Iron Demon.jpg|320px]] | ||
|- | |- | ||
|[[Image:Pit4.jpg|320px]] | |[[Image:Pit4.jpg|320px]] | ||
|[[Image:Pre-beta blood.jpg|320px]] | |[[Image:Pre-beta blood.jpg|320px]] | ||
|- | |||
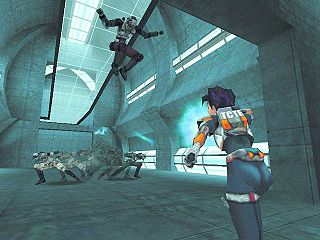
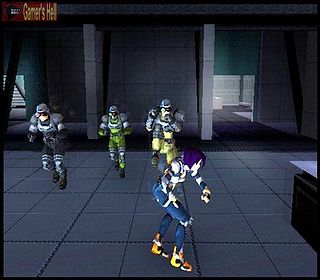
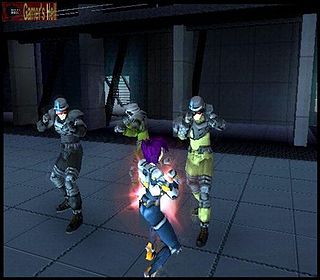
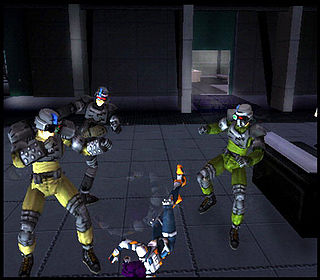
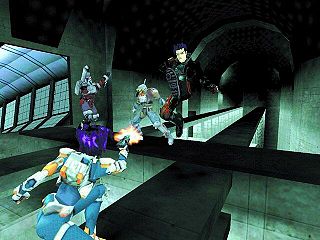
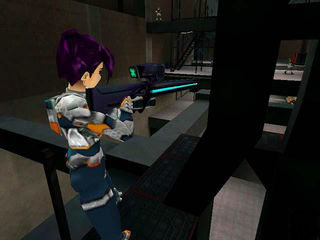
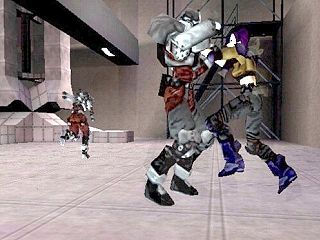
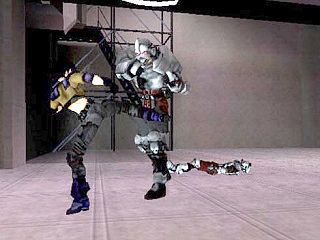
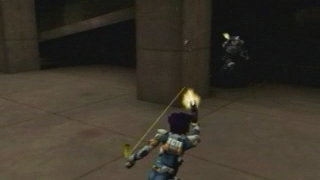
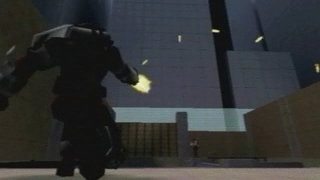
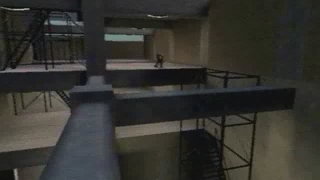
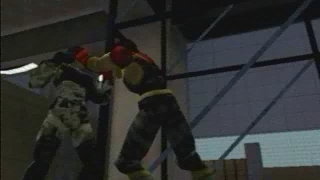
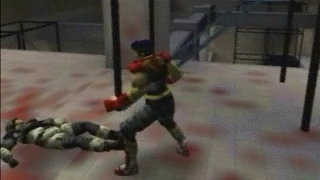
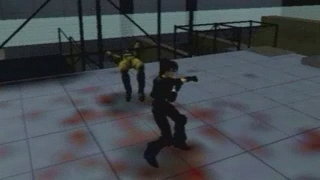
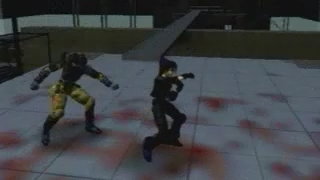
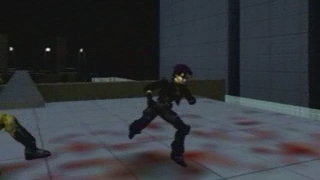
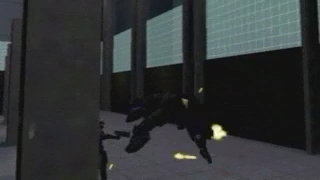
| colspan="2" | The first three pictures show some basic elements of the level's architecture (most notably, very steep stairs). The third picture shows [[Konoko]] knocking down an early [[Tanker]], with what looks like a collision glitch. The fourth picture is a rare glimpse at the [[Iron Demon]]. | |||
|} | |} | ||
| Line 585: | Line 575: | ||
|} | |} | ||
---- | |||
===AlexTestSite=== | ===AlexTestSite=== | ||
The script for this level, found in the '''ats''' folder in [[Big Blue Box|BBB]] Oni's IGMD, shows that this was a test level for Mukade's teleportation (with a comment referencing the "[[wikipedia:Bamf|bamf]]" sound effect of comic book fame). | The script for this level, found in the '''ats''' folder in [[Big Blue Box|BBB]] Oni's IGMD, shows that this was a test level for Mukade's teleportation (with a comment referencing the "[[wikipedia:Bamf|bamf]]" sound effect of comic book fame). | ||
---- | |||
===2000 demo level=== | ===2000 demo level=== | ||
The arena [[Credits|Steve Abeyta]] played in when he demoed netplay in 2000 (see [[Multiplayer]] for a video of this demonstration). Looks like it could be BGI HQ, except that there's no similarities with the four screenshots in the BGI section above. | The arena [[Credits|Steve Abeyta]] played in when he demoed netplay in 2000 (see [[Multiplayer]] for a video of this demonstration). Looks like it could be BGI HQ, except that there's no similarities with the four screenshots in the BGI section above. | ||
{| | {| style="width:650px" | ||
|[[Image:MP arena 3-1.jpg|320px]] | |||
|[[Image:MP arena 3-2.jpg|320px]] | |[[Image:MP arena 3-2.jpg|320px]] | ||
|- | |||
| colspan="2" | This is not the same side of the same room; probably both sides of that room. It is unknown what other rooms there are and where the overhead ramps are going. The ramp briefly flattens out before continuing to ascend, halfway through the room, which in these screenshots can be easily mistaken for some kind of distortion or modeling error. | |||
|} | |} | ||
---- | |||
===Miscellaneous mysteries=== | ===Miscellaneous mysteries=== | ||
{| | {| style="width:325px" | ||
| align="center" | [[Image:Pre-beta enigma 3.jpg|320px]] | | align="center" | [[Image:Pre-beta enigma 3.jpg|320px]] | ||
|- | |||
|According to Okita, this was part of Manufacturing Plant, but "was cut out later since there wasn't any need to go in there". | |||
|} | |} | ||
{| | {| style="width:525px" | ||
|[[Image:Pre-beta enigma 1.jpg]] | |[[Image:Pre-beta enigma 1.jpg]] | ||
|[[Image:Pre-beta enigma 2.jpg]] | |[[Image:Pre-beta enigma 2.jpg]] | ||
|- | |||
| colspan="2" | This looks like the Syndicate Warehouse or Atmospheric Conversion Center (interior), but doesn't match with the current versions of either. | |||
|} | |} | ||
---- | |||
==Cut weapons== | ==Cut weapons== | ||
{| style="width:650px" | {| style="width:650px" | ||
|[[Image:Genesis_Level3_8.jpg]] | | colspan="2" align="center" | [[Image:Genesis_Level3_8.jpg]] | ||
|- | |- | ||
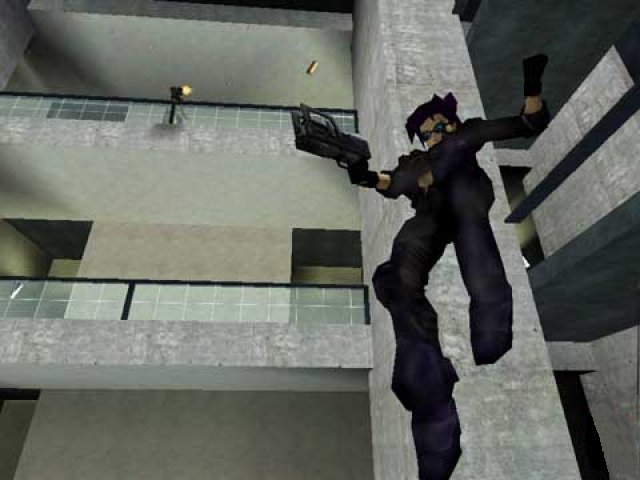
|This now-extinct pistol was seen all over the place back when Bungie was taking pre-beta screenshots. This was the [[:Image:Gun_smg_06.JPG|Shibume SH-40]], a fully-automatic pistol that fired 10 rounds/sec. | | colspan="2" | This now-extinct pistol was seen all over the place back when Bungie was taking pre-beta screenshots. This was the [[:Image:Gun_smg_06.JPG|Shibume SH-40]], a fully-automatic pistol that fired 10 rounds/sec. | ||
|- | |- | ||
|[[Image:Compound4.JPG]] | | colspan="2" align="center" | [[Image:Compound4.JPG]] | ||
|- | |- | ||
|An earlier machine gun with a visible clip of ammunition. | |An earlier machine gun with a visible clip of ammunition. | ||
|- | |- | ||
|[[Image:Early_scram_cannon_1.jpg]] [[Image:Early_scram_cannon_2.jpg]] | |[[Image:Early_scram_cannon_1.jpg]] | ||
|[[Image:Early_scram_cannon_2.jpg]] | |||
|- | |- | ||
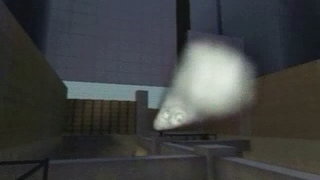
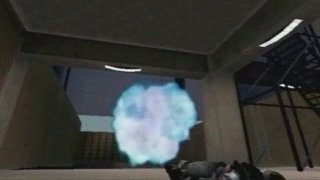
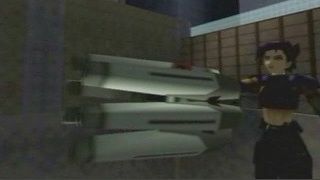
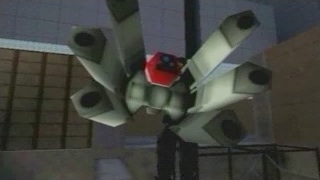
|The Iron Demon can be seen firing this weapon in the trailer at 1:25; [http://oni.bungie.org/special/part1/alex.html apparently] Konoko would salvage the gun from the ID after destroying it. Although fans were impressed by its size, some also wanted to know how petite Konoko could even hold the thing. Okita joked that it was filled with anti-gravity. This was probably the basis for the (much smaller) [[Quotes/Weapons#scramble|Scram Cannon]]. | | colspan="2" | The Iron Demon can be seen firing this weapon in the trailer at 1:25; [http://oni.bungie.org/special/part1/alex.html apparently] Konoko would salvage the gun from the ID after destroying it. Although fans were impressed by its size, some also wanted to know how petite Konoko could even hold the thing. Okita joked that it was filled with anti-gravity. This was probably the basis for the (much smaller) [[Quotes/Weapons#scramble|Scram Cannon]]. | ||
|- | |- | ||
|[[Image:Pre-beta enigma 5.jpg]] | | colspan="2" align="center" | [[Image:Pre-beta enigma 5.jpg]] | ||
|- | |- | ||
|Some sort of energy weapon? | | colspan="2" align="center" | Some sort of energy weapon? | ||
|} | |} | ||
[[Category:Oni history]] | [[Category:Oni history]] | ||
Revision as of 04:29, 7 May 2017
- This article focuses on aesthetic differences in pre-beta vs. retail Oni. See the Pre-beta features article for features removed from Oni during development.
Almost all available shots of pre-beta content are here, compared to final content when applicable. Most pictures are half-sized (click to enlarge).
Released levels
Decline in appearance
Fans have sometimes observed that earlier versions of Oni's levels as seen in pre-release screenshots and the 1999 trailer looked sharper or more detailed than the release versions. The reasons for these differences are given in these three posts by Hardy LeBel, Oni's Design Lead.
Syndicate Warehouse
There are 15 hidden doors there. When revealed, they turn this very linear level into a completely non-linear structure (more like a real warehouse).
Musashi Manufacturing Plant
This one has evolved quite a lot.
| File:ManPlant11.JPG | File:ManPlant12.JPG |
| File:ManPlant10.JPG | 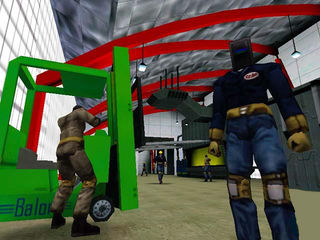
|
| There was more conventional warehouse machinery in here back then. | |
| |
|
|
|
|
|
|
|
|
| Note the door leading off the center of the foyer: there was a corridor running through the middle of the building. | |
| File:ManPlant3.JPG | 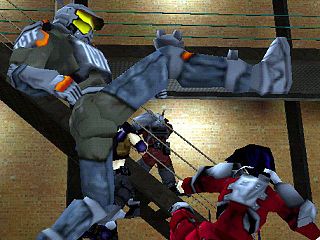
|
| File:ManPlant1.JPG | 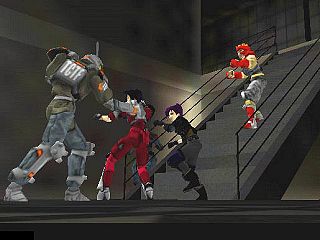
|
| |
| The last picture has a very provisional-looking health bar; these are some early screenshots. | |
| |
|
File:ManPlant5.JPG |
| File:ManPlant6.JPG | File:ManPlant7.JPG |
| File:ManPlant8.JPG | File:ManPlant9.JPG |
| The stairs lead up to the offices. | |
Vago Bio-Research Lab
This one has kept the same basic layout, but there were a few changes. The most distinct difference is the night-time setting.
|
|
| File:Vago3.JPG | 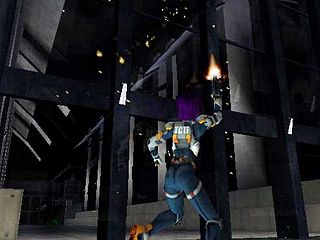
|
|
File:Vago11.JPG |
| The interior is only done in one half of the lab. There are also pillars and foyer doors missing, and extra ledges along the sides of the area where you fight Barabas. | |
|
|
|
|
|
|
| File:Vago19.jpg | 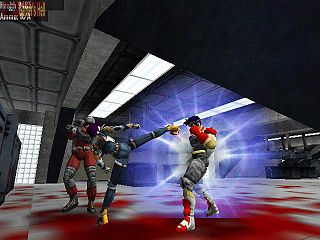
|
|
|
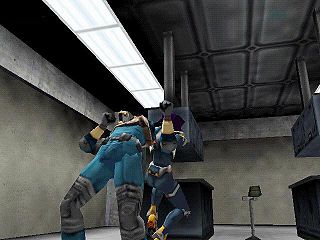
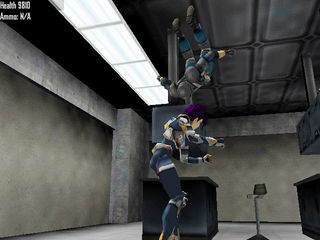
| There were stools for the scientists... apart from that, this wing is pretty much final. | |
|
|
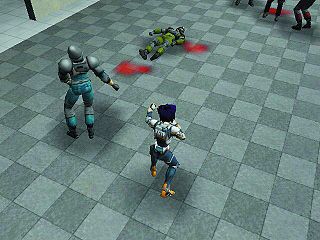
| The final ones are much thinner, and the layout of the stairs and catwalks is different. | |
Vansam Regional Airport
|
| This could be the "Arrivals" section (which is now completely empty). |
TCTF Regional Headquarters
|
|
|
File:TCTF8.JPG |
| A longer car. Different transition from the parking lot to the main building. Konoko's bike is parked nicely in that first shot, instead of laying on the floor. | |
|
File:TCTF3.JPG |
| File:TCTF7.JPG | File:TCTF12.JPG |
| The room is more than 2 times wider now. There are windows on the right and catwalks running across the far side. The entrance door changed a lot, but the van didn't change much... | |
|
|
| |
| The elevator was between the two sets of ramps. Solid floors had a tiling pattern, and ramps were transparent. | |
|
|
| File:TCTF13.JPG | File:TCTF14.JPG |
| File:TCTF15.JPG | File:TCTF17.JPG |
| The ramps had really nice railings (I wish they'd kept them), overall the room was much lighter (there's a light wall on the far side). Same "V" structures at the ceiling as above: they're gone now. The layout of the rooms on either side is different, too. | |
|
File:TCTF11.JPG |
| File:Genesis Level8 11.jpg | |
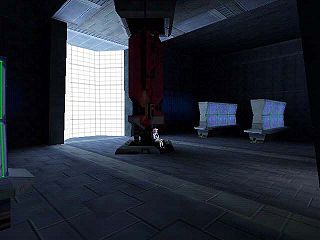
| The model didn't change at all, but now it's placed at the center (floor 2/3) of a really tall, open room. As for the terminals, there are primitives with similar looks, around Damocles and elsewhere. Note the Marathon logo on Damocles's hull (an Easter egg). | |
| File:TCTF1.JPG | File:TCTF10.JPG |
| File:TCTF4.JPG | File:TCTF9.JPG |
| The parking lot was more lushly lit on the outside. Now there's no light on the sidewalks. There used to be a lot more cars in the garage, too. | |
| File:TCTF5.JPG | File:TCTF19.JPG |
| File:TCTF20.JPG | |
Atmospheric Conversion Center
|
|
|
|
|
|
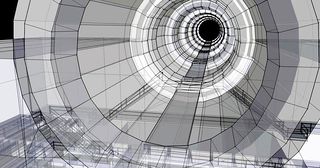
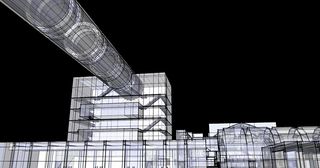
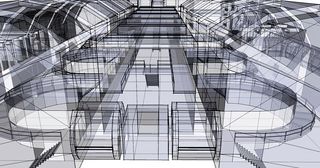
| These shots are probably from the time when this was an electric plant. Note that the giant tube that serves as the end of the level (seen in the first pic) has a floor to walk on, in place of the electrified beam suspended in the middle, which Konoko runs down while being pursued by the TCTF. The pipe is also connected directly to the building, rather than being at the top of an elevator shaft. In the current version of the level, the mid-air beam is also the shaft for the giant fan; adding the fan was probably a hasty improvisation to make the level seem more like an ACC and less like an electric plant... but the fan shaft is still electrified! | |
Regional State Building
Hardy once stated that RSB was the first building that Bungie completed. Apparently that is also why it's been through so many changes.
|
|
| File:RegionalState23.JPG | File:RegionalState1.JPG |
| File:RegionalState4.JPG | File:RegionalState6.JPG |
|
|
|
|
| These screenshots are taken from this show floor trailer. The last three images show a sequence that uses multiple camera angles, in which a cop is knocked down by what appears to be the Tanker rolling attack, but with energy shooting from its starting point. | |
|
File:RegionalState10.JPG |
| File:RegionalState11.JPG | File:RegionalState2.JPG |
| File:RegionalState7.JPG | File:RegionalState8.JPG |
| By the time Bungie took the outside shot with the Iron Demon, they'd barred in the foyer. Also, notice the missing wall of glass in the last set of pics. This section is now occupied by a wall with a normal-sized door set in the middle of it. The original wide-open entrance is an odd design choice. Could it have been a pet door for the Iron Demon? Most likely the ID was only shown in this level because it was their "test-bed" level, since it was really meant for BGI HQ, but perhaps an initial skirmish was once planned here. Finally, note the multiplayer HUD in the top-right of many of these pictures; the screenshot-taker was in MP mode at the time. | |
Rooftops
TCTF Science Prison
|
| New wall textures. Looks like the scanner's textures are actually higher-res than what we have now. |
Syndicate Mountain Compound
| Pre-beta | Now |
|---|---|
|
|
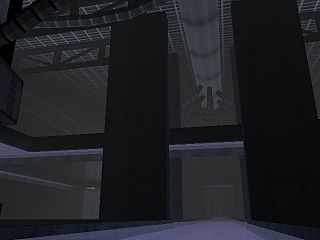
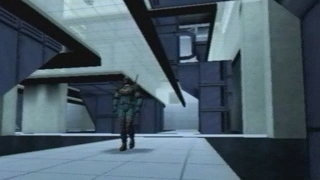
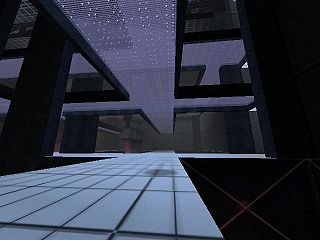
|
|
|
|
|
|
| File:Compound3.JPG | File:Compound4.JPG |
| The basic layout of the room is the same, but it was much more crowded with "computers" and the existing catwalks were aligned differently. | |
| File:Compound5.JPG | File:Compound6.JPG |
| File:Compound7.JPG | File:Compound14.JPG |
| File:Compound15.JPG | |
| Apparently the Syndicate is also in league with BLAM Transport Inc.! Another BGI front? | |
Cut levels
Names of these levels
Level names in Oni are stored in the global resource file known as "level0_Final", so that the out-of-game loading dialog can display them. Somewhat surprisingly, the names of missing levels are present even in retail versions of Oni.
It appears that levels below 20 were intended as single-player levels, 30-35 were multiplayer maps, and the rest were test levels. For some of those levels, there are fragmentary scripts which can be found in the Big Blue Box release of Oni. If there was any info to be gleaned from those scripts, it is described in that level's section. Here are the missing levels alongside their presumed BSL folder names. Click the name to jump to that section below:
| # | Name | BSL |
|---|---|---|
| 05 | The Airport Part Deux | Airport_II |
| 07 | Obsolete | |
| 16 | BGI HQ | BGI |
| 30 | The Arena of Pain | aop |
| 31 | Crossing Zone | CZ |
| 32 | Pit | pit |
| 33 | Crossing Zone Too | CZ_II |
| 34 | Capture | cap |
| 35 | Territories | |
| 36 | Test_Stuff | |
| 55 | AlexTestSite | ats |
| 66 | Experimental_II | |
| 68 | MARTY'S SOUND CORRIDOR | |
| 71 | FiringRange | SR |
| 77 | One Room | |
| 88 | One Room 2 | |
| 99 | Test Barn II |
Airport Part Deux
The presence of the Airport_II IGMD folder in BBB Oni explains why retail Oni contains an Airport and Airport_III folder but no "Airport_II". The scripts in this folder are very short and little of the level can be gleaned from them. However, a mention of the animation "KONOKOlev5_outro_run" allows us to pin down Airport_II as the missing level 5 in the sequence of levelx_Final folders in GameDataFolder. This is consistent with Airport being linked to level4_Final and Airport_III being linked to level6_Final. This post by Chris Butcher indicates that there was an underground portion to the Airport which was removed.
Obsolete, etc.
This level, which would have been level7_Final, represents the gap between the end of the airport levels and the first TCTF HQ level. Since Bungie blanked the name of this level, we can only speculate on this level and the unnamed levels 15 and 17 (for 16, see below). However, Chris Butcher's comment above and Hardy's comment here indicate that levels were originally planned according to an earlier version of the story, hence the gaps in numbering are mostly indicative of a change in plans, rather than of content actually being created and then cut.
BGI HQ
This level was likely intended as Konoko's final confrontation with the shadowy BGI, which was later excised from the story as Oni's development ran out of time. Fragments of a script for this level can be found in BBB Oni. The scripts contain two cutscenes, one of which describes Konoko setting a bomb and taking cover, and the resulting explosion, and the other cutscene introduces the Iron Demon that would end up getting cut from the game. The number of the level indicates that these events would take place before Konoko returns to the TCTF to confront Griffin and after meeting with Kerr in the Science Prison.
The four screenshots we have for the level are about as uninformative as possible, but it at least demonstrates that the level was once under development.
| File:BGI1.JPG | File:BGI2.JPG |
| File:BGI3.JPG | File:BGI4.JPG |
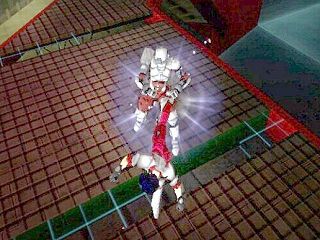
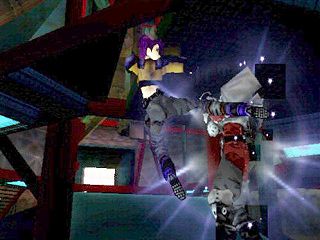
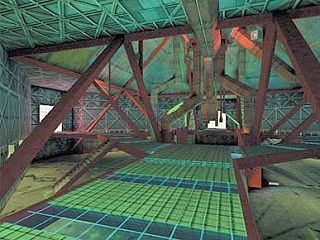
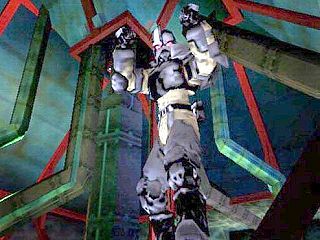
Arena of Pain?
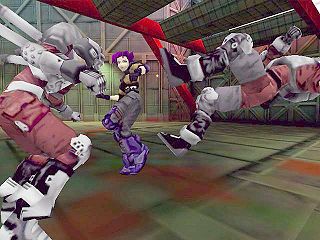
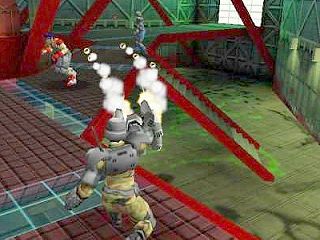
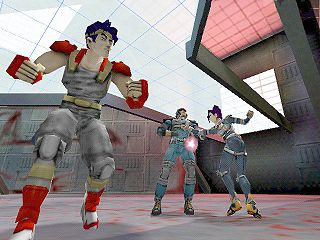
A very simple arena level, at various stages of development, or in various flavors. Possibly "The Arena of Pain".
|
|
|
|
|
|
| File:1999 Trailer - MP arena 1-8.jpg | 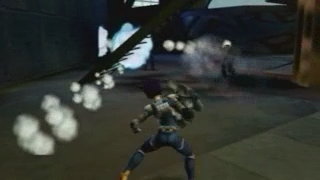
|
| |
Crossing Zone?
|
|
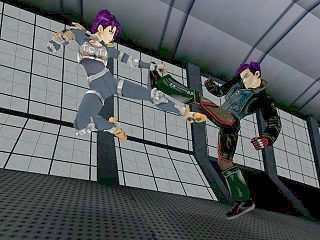
| Alex Okita remembered this as "Just a bunch of tubes"; "It was pretty big, lots of falling and dying, from what I remember". The cross-beams are also reminiscent of Construction Pit. | |
Construction Pit (The Pit)
A giant playground where most of the 1999 trailer gameplay was recorded.
| File:Pit1.JPG | File:Pit2.JPG |
| |
|
|
|
|
|
|
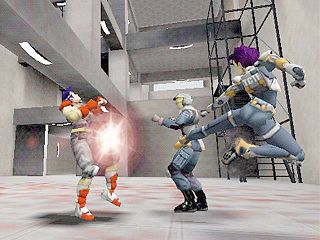
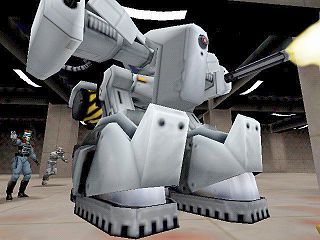
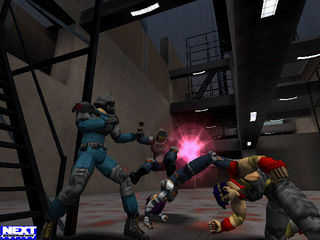
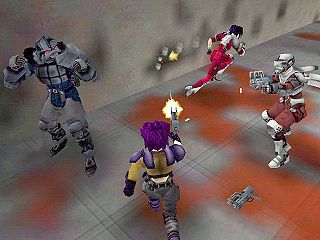
| The first three pictures show some basic elements of the level's architecture (most notably, very steep stairs). The third picture shows Konoko knocking down an early Tanker, with what looks like a collision glitch. The fourth picture is a rare glimpse at the Iron Demon. | |
| File:1999 Trailer - MP arena 2-5.jpg | File:1999 Trailer - MP arena 2-6.jpg |
| File:1999 Trailer - MP arena 2-7.jpg | File:1999 Trailer - MP arena 2-8.jpg |
| File:1999 Trailer - MP arena 2-9.jpg | 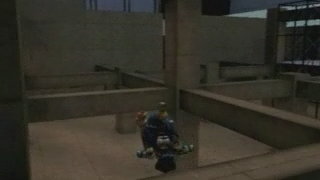
|
|
|
|
|
|
|
|
|
|
|
|
|
|
|
|
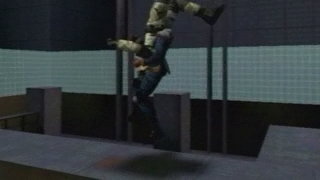
|
AlexTestSite
The script for this level, found in the ats folder in BBB Oni's IGMD, shows that this was a test level for Mukade's teleportation (with a comment referencing the "bamf" sound effect of comic book fame).
2000 demo level
The arena Steve Abeyta played in when he demoed netplay in 2000 (see Multiplayer for a video of this demonstration). Looks like it could be BGI HQ, except that there's no similarities with the four screenshots in the BGI section above.
Miscellaneous mysteries
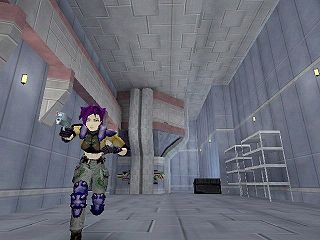
|
| According to Okita, this was part of Manufacturing Plant, but "was cut out later since there wasn't any need to go in there". |
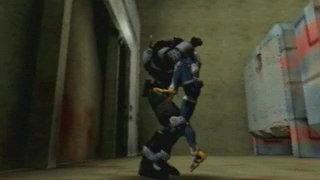
|
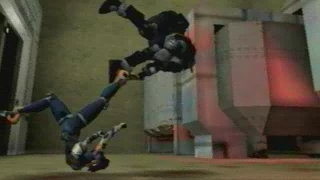
|
| This looks like the Syndicate Warehouse or Atmospheric Conversion Center (interior), but doesn't match with the current versions of either. | |
Cut weapons
| |
| This now-extinct pistol was seen all over the place back when Bungie was taking pre-beta screenshots. This was the Shibume SH-40, a fully-automatic pistol that fired 10 rounds/sec. | |
| File:Compound4.JPG | |
| An earlier machine gun with a visible clip of ammunition. | |
|
|
| The Iron Demon can be seen firing this weapon in the trailer at 1:25; apparently Konoko would salvage the gun from the ID after destroying it. Although fans were impressed by its size, some also wanted to know how petite Konoko could even hold the thing. Okita joked that it was filled with anti-gravity. This was probably the basis for the (much smaller) Scram Cannon. | |
| File:Pre-beta enigma 5.jpg | |
| Some sort of energy weapon? | |
